OSX loves PDF files. Unlike Windows, Macs come pre-installed with a stock application for viewing and editing PDF files, something that Windows users have to download and even purchase separately!
Most people just use Preview to view PDF files and think that’s all it’s good for, but lucky for you, Preview can do so much more. Check out the 5 tips for working with PDF files in OS X and up your PDF game.
1. Crop
Believe it or not, you can crop a PDF file the same way you’d crop an image. This is especially useful when dealing with images that are saved as PDF files in OS X.
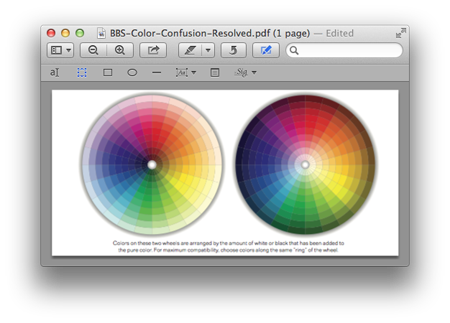
To crop a PDF, first open the file in Preview, then click on the Edit button to show the edit toolbar. With the toolbar showing, click on the Rectangular Selection tool and draw a rectangle around the area you want to crop.
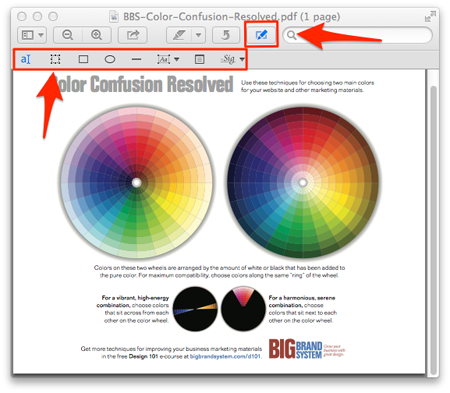
Next, click on the Crop button that appears in the editing toolbar and click OK past any warnings that appear. All that’s left is to save your new file and you’re done.
2. Export as PDF
Preview is great at not only editing PDF files, but creating them, too. You can make just about any image or document into a PDF pretty easily with Preview, no matter the file type.
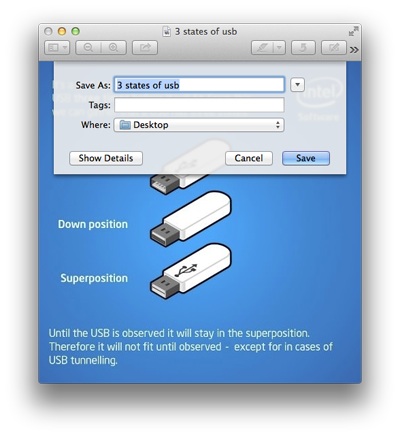
To export a file as a PDF, open it inside of Preview and click File > Export as PDF, then choose the file name you want the new PDF to have, and where you want to save it, then click Save.
SEE ALSO: Create Your Own Lego 1984 Mac
3. Bookmark PDFs
If you have a few pages in a long PDF file that you reference on a regular basis, you can actually bookmark them right inside of Preview so you see them every time you open the PDF file in OS X Preview.
To bookmark a PDF page, open the file up in Preview, scroll down to the page you’re looking for and hit Command + D to add it to your Bookmarks list. To view Bookmarks click on the View menu > Bookmarks.
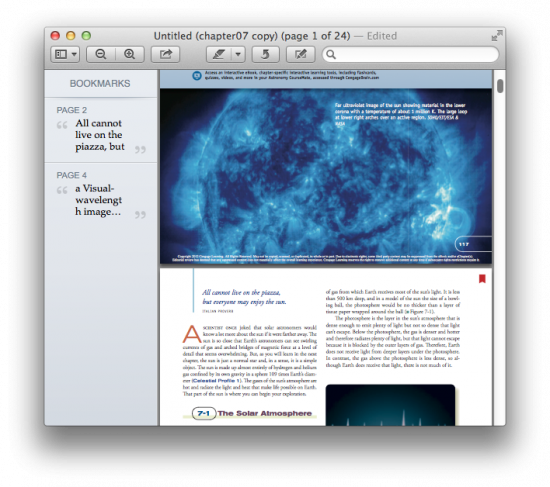
These only work inside of a PDF file, so you can only view the bookmarks for PDF1 inside of PDF1, and the bookmarks for PDF2 inside of PDF 2. The more pages the PDF has, the more useful this feature is.
4. Rearrange PDF Pages
Let’s say you have an existing PDF file and you want to reorder the pages. Preview can help you do this as easily as reordering a playlist in iTunes.
Open the multi-page PDF in question inside of Preview and click the View menu > Thumbnails. Next, click on the page you want to move and drag it where you want it to be. When you’re done, save the new file. If you’re working with a locked PDF, you will need to save a new version first before moving any pages. When you save the new file after the moves, your PDF will be in the order you want.
RELATED: How to Rename Files with Automator
5. Annotating and Signing PDFs
Preview allows you to mark up PDF files with annotations so you can add arrows, boxes, text, highlights, and even signatures right to the PDF and save a new copy with your edits done to it.
Open up a PDF file you want to mark up in Preview and click on the Edit button in the toolbar (right next to the search box)
With the toolbar open, you can use all the items you see listed to edit the PDF with your comments.
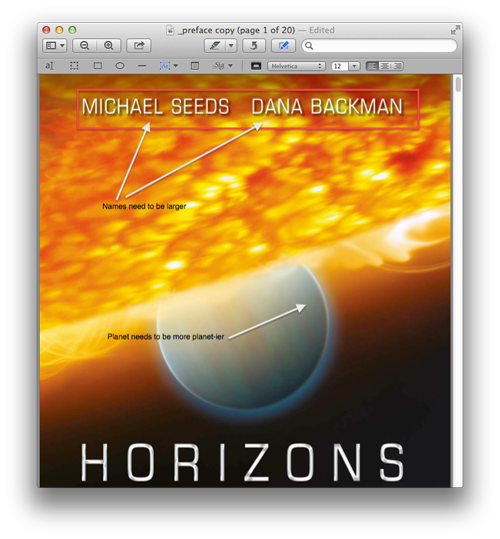
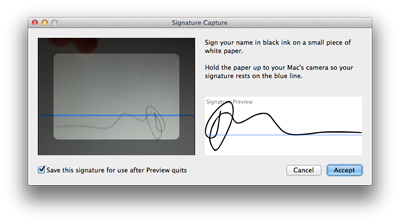
Now you can comment and edit PDF files in OS X Preview. What about all those PDF files you need to sign? Instead of printing them, signing them, and scanning them back in, all you have to do is open the PDF in Preview, click the Edit button, and then click the Signature button. Follow the instructions given and you can actually add a signature using your iSight camera, no printing or scanning required.
