While the feature was removed in El Capitan, native software RAID has returned in macOS Sierra. You can access it through Disk Utility, and the graphical interface makes it easy to configure either RAID 1 or RAID 0.
Which RAID?
RAID stands for Redundant Array of Independent Disks. It’s a protocol that allows users to combine multiple physical hard drives into a single logical data storage structure. This is then seen by the operating system as one drive, despite being made from multiple physical drives.
There are a bunch of varieties of RAID. macOS provides native software support for the most common types: RAID 1 and RAID 0.
RAID 1
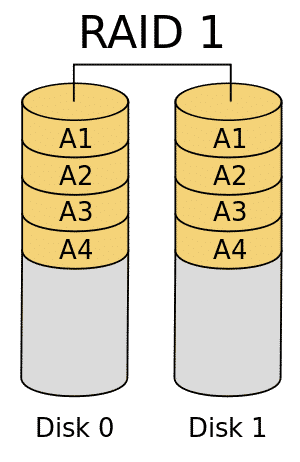
RAID 1, commonly called “mirroring,” use two or more hard drives containing exactly the same data. In this way, the user is protected against the sudden failure of a disk. It’s important to note that RAID 1 alone isn’t backup. Any user errors or corruptions will instantly copy themselves to both drives. It’s also only as fast as the slowest hard drive in the RAID set, since write operations must be done simultaneously.
RAID 0
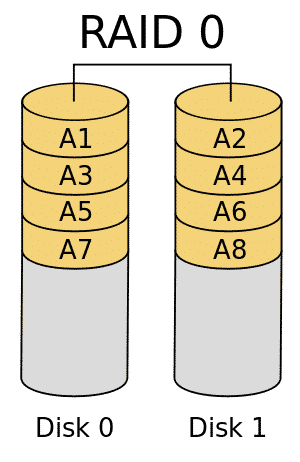
RAID 0, commonly called “striping,” shares data across both disks without duplication. You can no redundancy, but you can see a significant increase in read and write speeds. Because RAID 0 includes no duplication, if one drive fails in a RAID 0 array, the whole thing is hosed. This is awesome for applications that require high disk performance but can tolerate a lower level of data integrity, like scientific computing or AV processing.
JBOD
macOS also offers JBOD, which stands for “Just A Bunch Of Disks.” It’s as prosaic as it sounds. The OS combines two or more drives under one drive name and icon, creating one “logical” disk out of multiple physical disks. You won’t get any of the features or benefits of RAID 0 or 1. JBOD is essentially a directory of physical hard drives for user convenience.
Setting Up RAID in Disk Utility
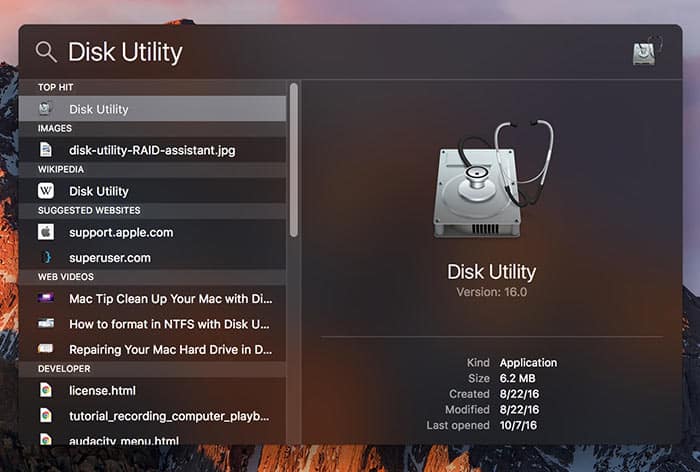
1. Open Disk Utility. Look in /Applications/Utilities or type Disk Utility into Spotlight.
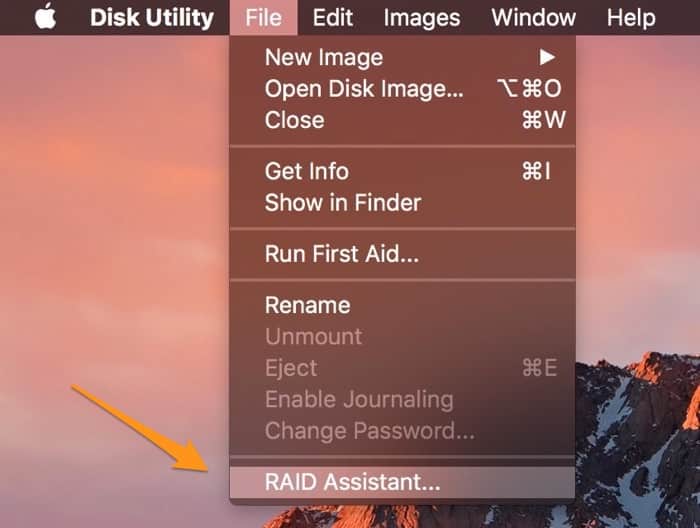
2. Click the File menu and choose the menu option labeled RAID Assistant…
3. In the next dialog box choose the type of RAID array you’d like to create. Click Next when you’re ready.
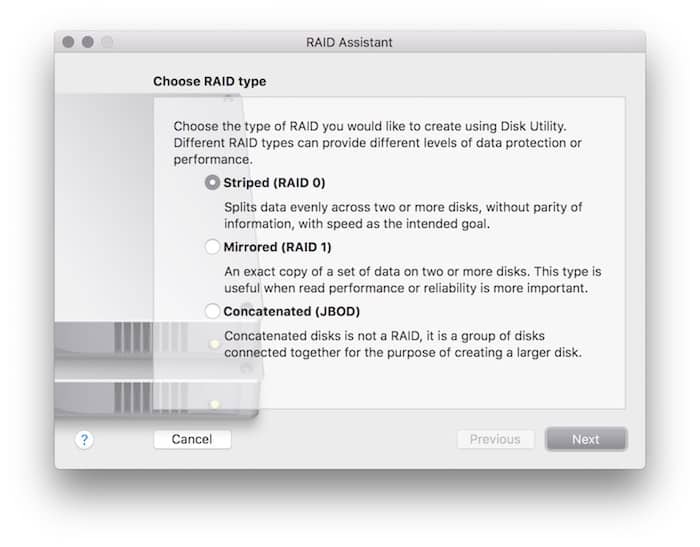
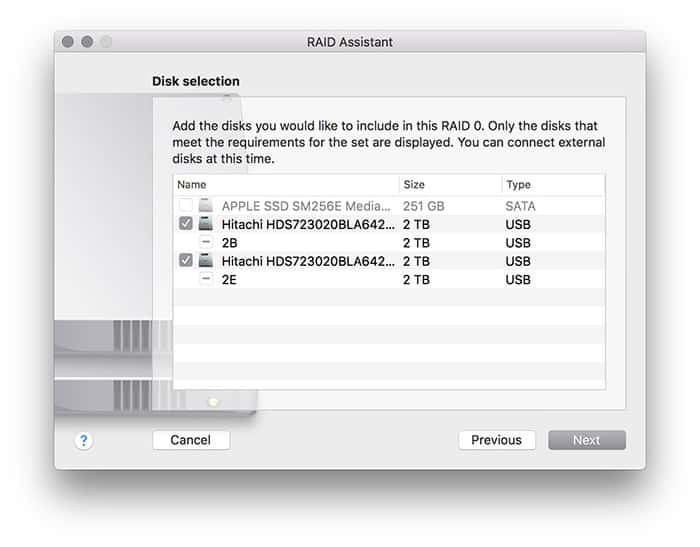
4. Select the hard drives you want to include in your new RAID array. You’ll see the same screen here regardless of the kind of array you chose in the last step
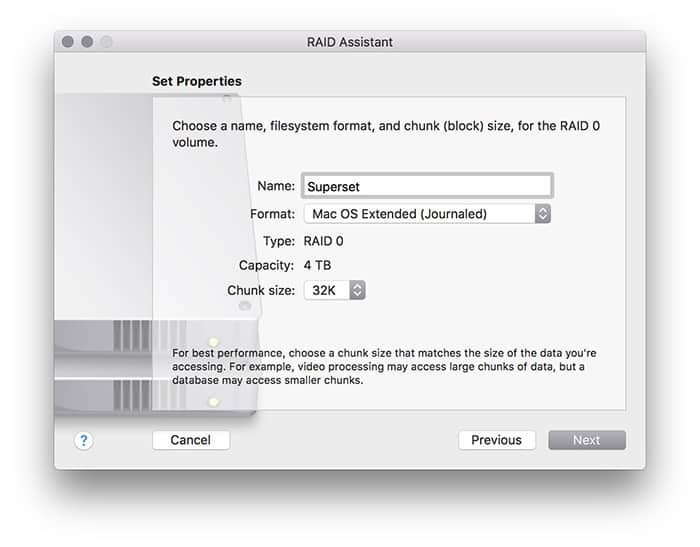
5. Give your RAID array a clever name. Leave the other options on the default settings. Click Next when you’re done.
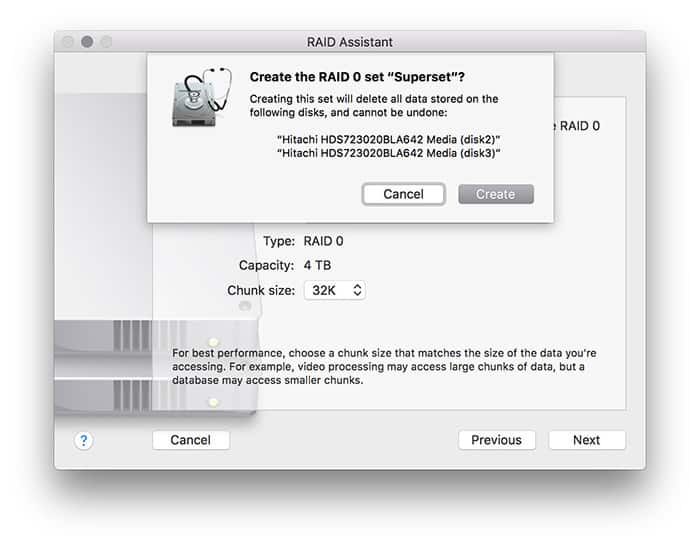
6. Confirm that you’ve selected the right disks, thought he names might not be too useful. Click “Create” to finalize the array. This will automatically format the disks and destroy any data on the drives, so make sure you don’t care about that.
7. Wait for your array to spin up. This might take a couple minutes, depending on the size of your array and your interface speed.
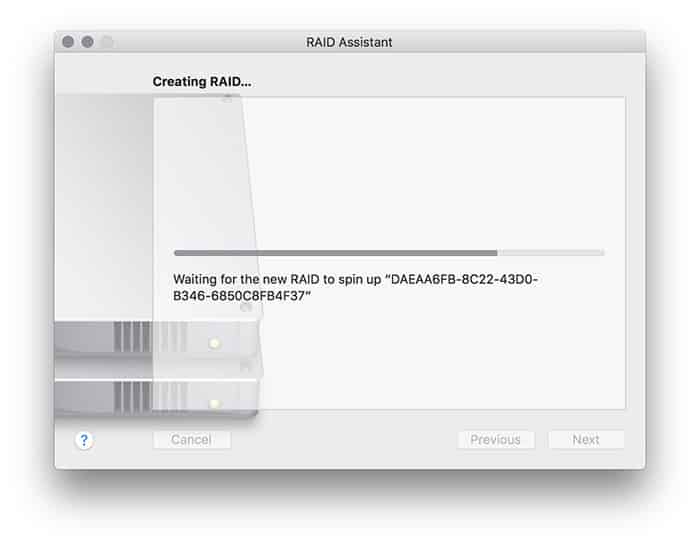
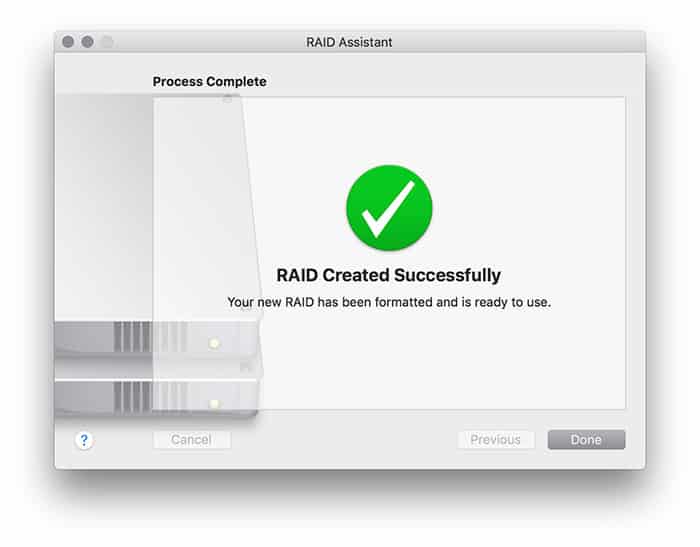
8. The array is now ready for use!
In the main Disk Utility window, you should now see your new RAID array in the sidebar. Click on it to see more info about the array.
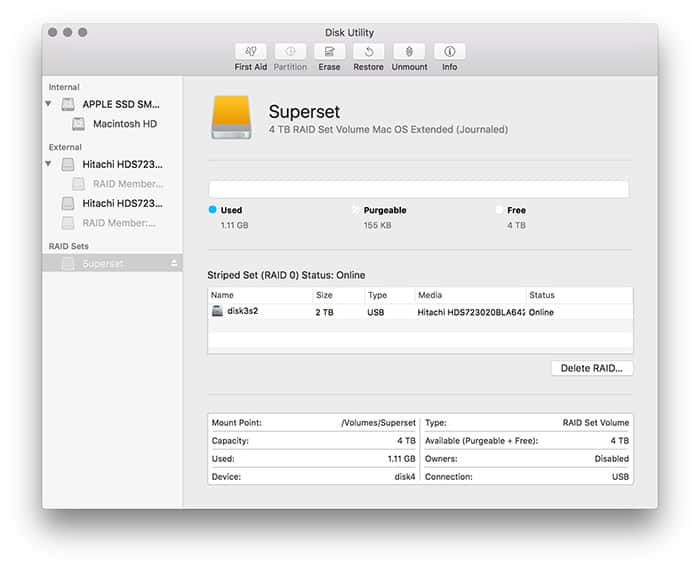
If you have selected RAID 0, the disks you selected will be automatically striped together. If you’ve selected RAID 1, those disks will become mirrors of one another. And if you’ve selected JBOD, all those disks will now appear under a single name and icon within the operating system.
Deleting a RAID Array
To break up a RAID array, you’ll need to delete it. This will destroy all the information on the array, so only do this when you’re done. This is especially true of a RAID 0 array, which requires all members to function at all.
1. Open Disk Utility.
2. Select your RAID array in the sidebar.
3. Click the button labeled Delete RAID…
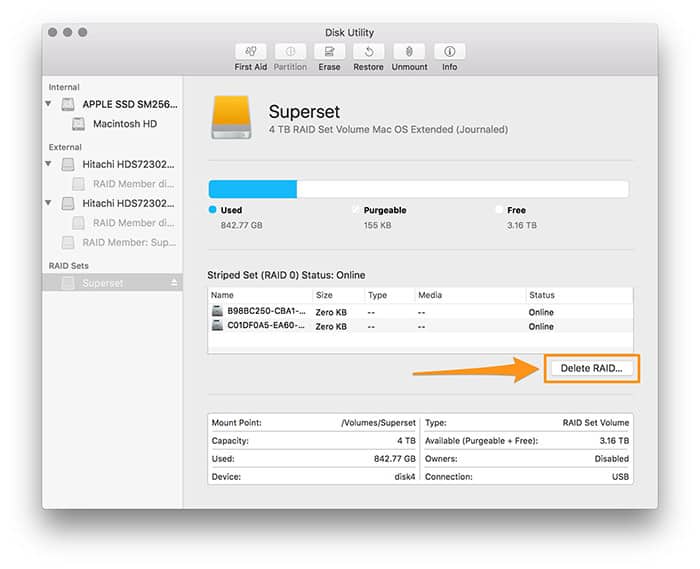
4. Confirm your choice in the next dialog box. This will completely erase the disks, so double check.
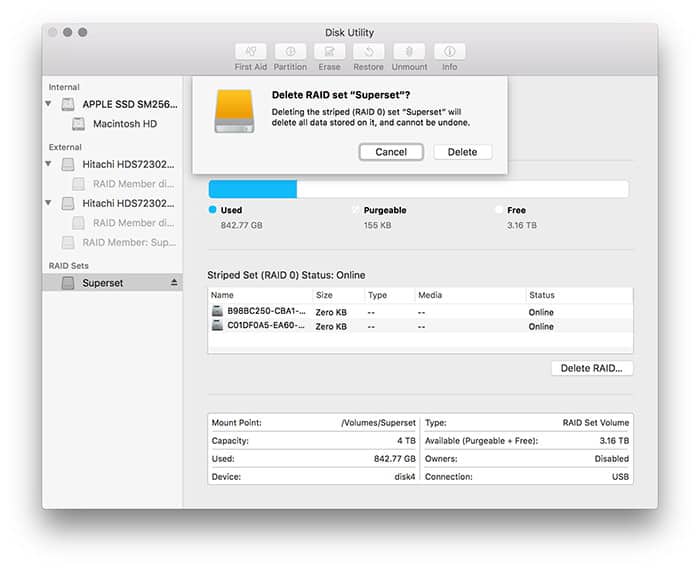
5. Hang tight while the array erases.
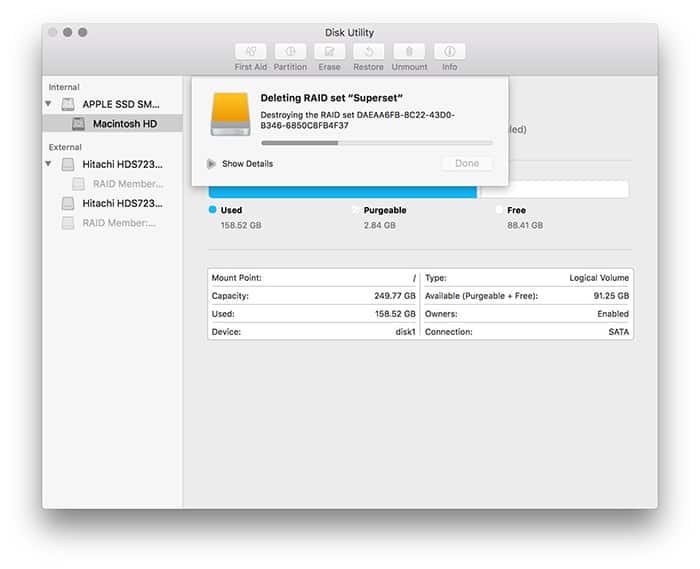
6. The array will disappear from the sidebar when you’re done.
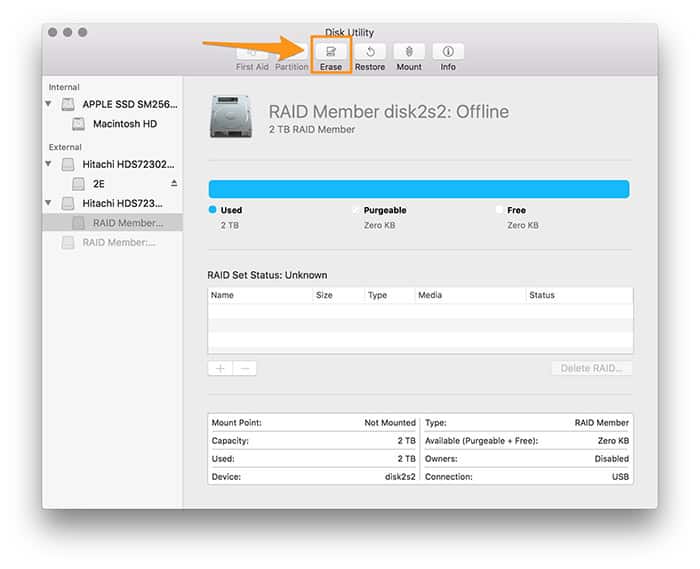
7. You will need to manually reformat the array’s constituent drives before you can reuse them. Select one of the former array’s disks and click the Erase button in the toolbar. If this button is greyed out, make sure you’ve selected the volume in the sidebar that starts with “RAID Member” rather than the disk itself.
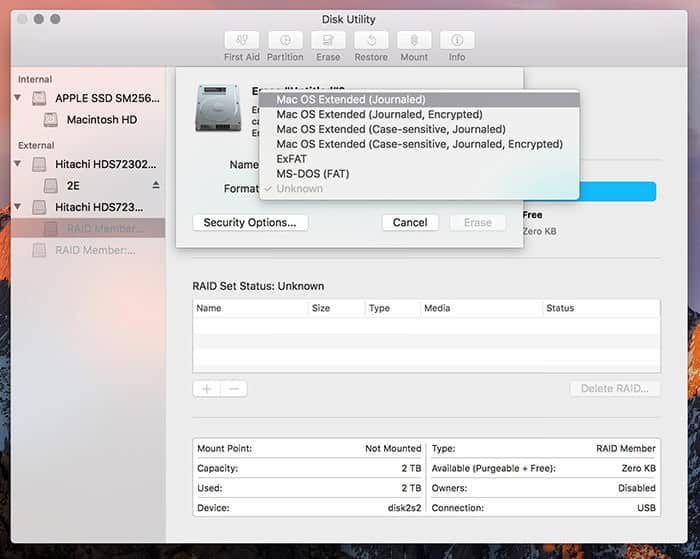
7. Select a disk format in the next dialog box. Typically, this would be automatically filled in, but here you’ll need to make an affirmative selection. Mac OS Extended (Journaled) is or APFS is fine. Click Erase.
Conclusion
RAID o or RAID 1 can both be configured easily through macOS Sierra’s Disk Utility app. If you want performance and can tolerate low data integrity, go for RAID 0. If you want to protect against disk failure, check out RAID 1. And if you just want to combine a bunch of disks under a single icon, JBOD is for you.
You might also like:


4 thoughts on “Create a RAID Array on macOS Sierra”
Can I use the JBOD option to make a very large backup disk?
Yeah, that should work!
Is there a way to rename the identifier of a partitioned disk. Say I partitioned a thumb drive into two parts (disk4s1 and disk4s2) Is there a way to rename the identifiers so that the partitions on one thumb drive can be striped (RAID 0)? Someone said that it is possible to RAID 0 two partitions of the same drive in Linux using the mdadm command and I figured the two systems were closely related so…
Thank you sir for this info. finally i got Raid0 setup on 2 external SSD 1T +1T drives. I will install them on my MacBook Pro with Sierra OS as soon as I finish the backup.