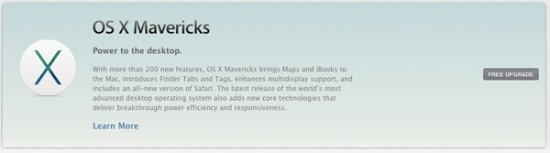
In the past, upgrades to Apple’s flagship OSX were done via a CD purchased in an actual store. This made it nice and easy to upgrade each machine. With the last couple versions of OSX that have been released, including OSX Mavericks, the upgrade is done completely online via the Mac App Store.
While this is great for cutting down on materials used, it does make it a pain to install on multiple machines. The download comes in at 5.3 GB, which makes for a fairly long download on most broadband connections. It is possible however, to clean install OSX Mavericks with a USB flash drive, so you only need to download it once.
There are two steps to setting up OSX Mavericks fresh from a flash drive. First you need to turn the flash drive into a bootable device, and then you need to install it. Part one will show you how to get the flash drive all set up and part two will show you how to get started with the Install.
Part 1 – Mavericks In A Flash
You can complete the steps below with or without OSX Mavericks already installed on your machine. If you already have it installed and want to make a flash drive for other machines, follow the steps as listed. If you’re making an installer without upgrading, skip step 1 below and head on over to the Updates tab in the Mac App Store and OPTION-Click the FREE UPGRADE button next to Mavericks.
1. Download Mavericks (again)
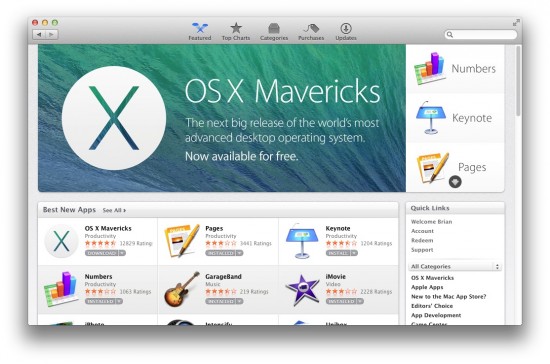
Head over to the Mac App Store and find the OSX Mavericks page. It should be shown in the front page. Click on it to continue.
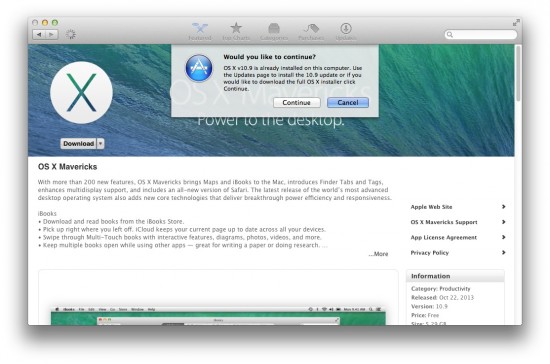
When you click on it, you should see a Download button where the purchase one used to be. Click this to start your download. Since the file is over 5 GB, it’ll probably take a little time. You will get a warning telling you OSX Mavericks is already installed. Click Continue.
2. Make The Flash Drive
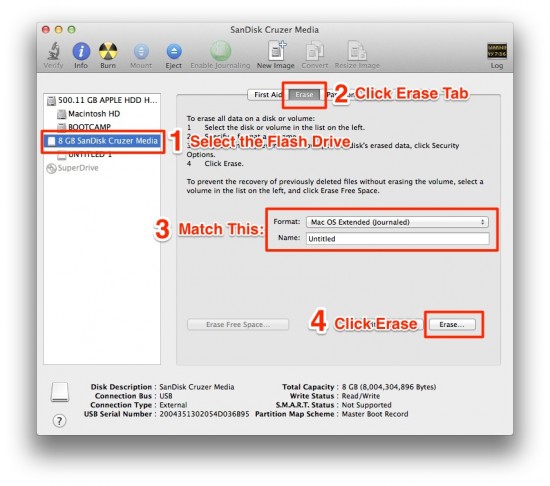
With the OS downloaded to your machine, it’s time to make the flash drive bootable. Plug in the flash drive, then open up Disk Utility (Applications>Utilities>Disk Utility) Next, click the flash drive in the left sidebar.
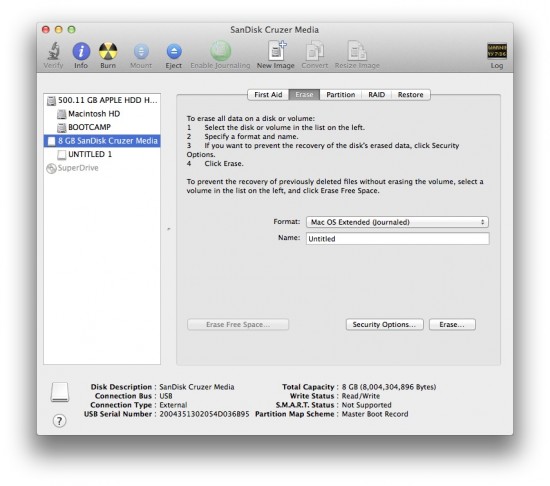
With the flash drive selected; click the Erase tab at the top of the window. Choose Mac OS Extended (Journaled) for the format, leave the Name set to Untitled, and click the Erase Button. A warning will pop up. Click Erase again to continue.
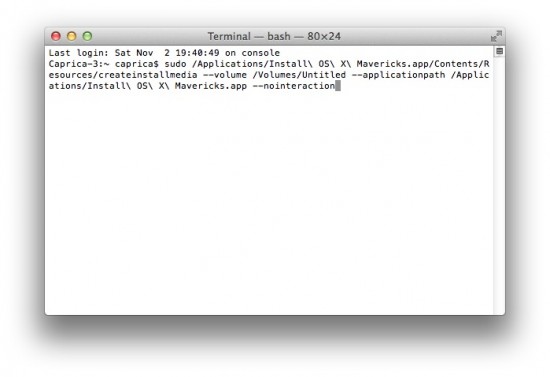
Once this is complete, you can close Disk Utility. Open up Terminal (Applications>Utilities>Terminal) and paste the following command into it. Make sure to copy it EXACTLY as seen below. This will copy the OSX Installer to your thumb drive. Once pasted, hit Enter.
sudo /Applications/Install\ OS\ X\ Mavericks.app/Contents/Resources/createinstallmedia --volume /Volumes/Untitled --applicationpath /Applications/Install\ OS\ X\ Mavericks.app --nointeraction
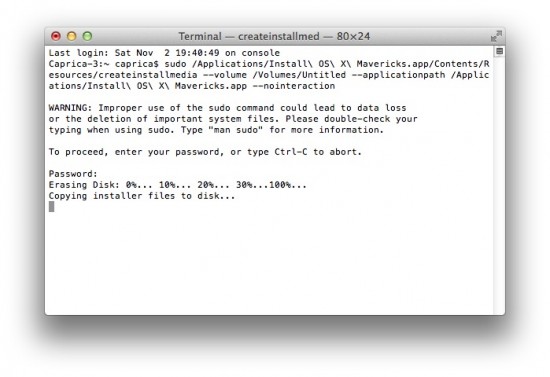
You will be prompted to enter an administrator password. When you’re typing, it’ll look like nothing is being entered. This is OK and is done by Terminal for security purposes. When your password is entered, hit Enter. You will see Terminal start to work on your Flash drive. It will look frozen like the screen shot below, but this is OK. The process will take 20-30 minutes.
When it’s all done, you should see this:
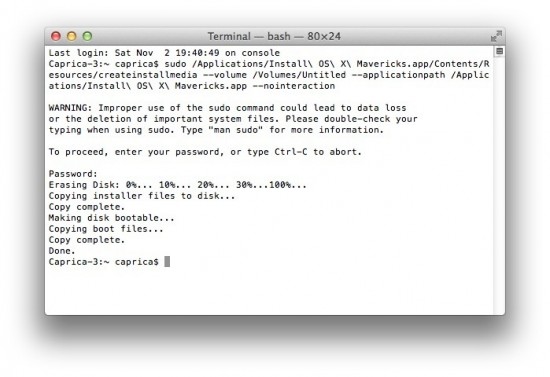
You can now quit Terminal. Your USB flash drive is now a fully bootable OSX Mavericks Installer.
Part 2 – A Clean Break
With Mavericks set up to install from your bootable flash drive, you’re ready to install it. With the machine of choice turned off and plugged in to a wall outlet, plug your new bootable USB drive in and hit the power button for the computer. As soon as you hit the power button, start holding the OPTION key down until you see the screen below:
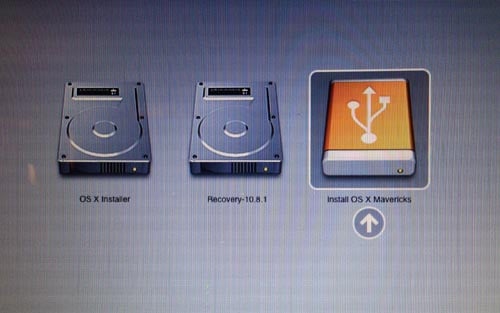
Double-click the Install OS X Mavericks item to start the process. You should be booted into an OSX Utilities Screen. Click Install OS X, then Continue. It can take a few minutes for this screen to pop up, so be patient.
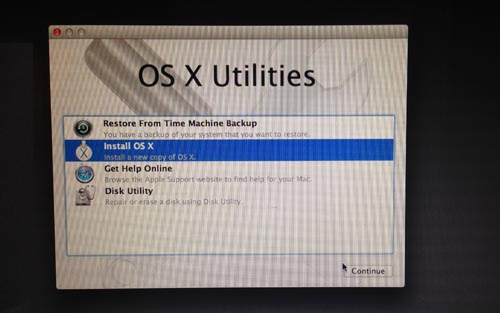
At this screen, you can opt to just install OSX Mavericks, or to completely wipe the drive & install Mavericks on a completely fresh drive. If you choose to do this, make sure your data is backed up! Click on Disk Utility, then select the hard drive from the list (the first entry.)
With the hard drive selected, click on the Partition tab. You should now see this:
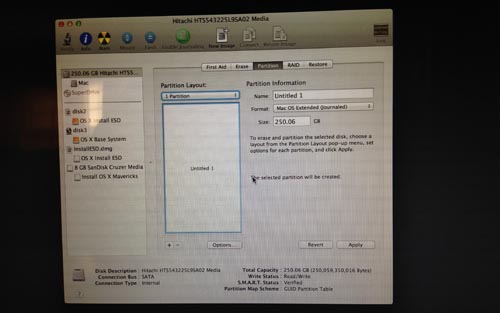
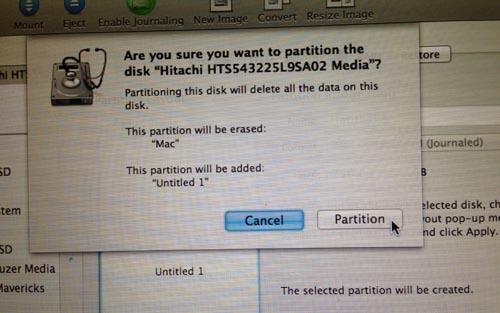
Under Partition Layout, choose 1 Partition, leaving all other settings alone. Click Apply. You will get a warning, click Partition to continue. This will wipe your drive, so make sure you ar backed up!
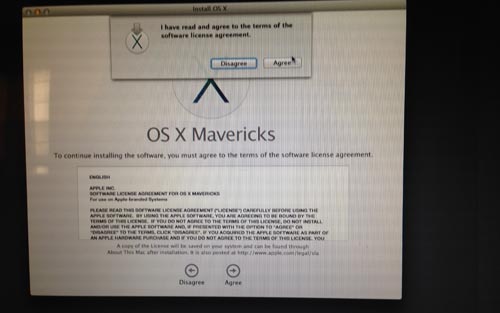
Click Continue to start the installation. Follow the instructions that appear and agree to the terms for install. Exit Disk Utility to get back to the Mavericks screen, then click the Install OSX Option.
Click Continue to move forward, then follow the instructions that appear and agree to the terms for install.
Next, select the drive to install to. (always choose the internal drive).
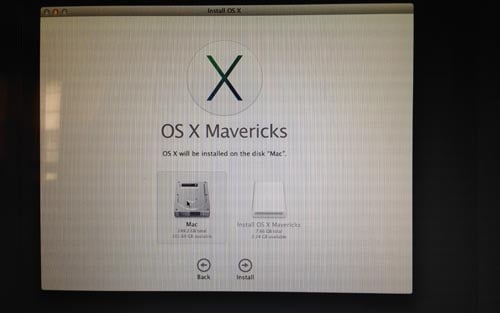
The installation will now run and should take around 20-25 minutes to complete.
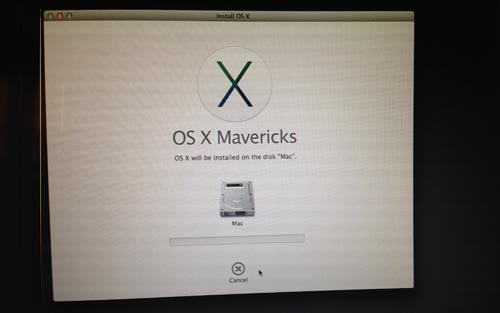
Note: You may notice the installer freezing at “About a second remaining” for a few minutes. While silly and annoying, this is not a sign of anything wrong. Just let it finish and DO NOT hit the cancel button.
Your computer will now restart and the installation process will run through the setup process which usually takes anywhere from 30-45 minutes. When the process is complete, your Mac will restart and you should see the login screen. With this, the install process is complete and you should have a new, fresh copy of OSX Mavericks.
If you opted to do a completely fresh install, you’ll need to set up your account-specific options as well, & restore from a backup if you made one.


9 thoughts on “How To Clean Install OSX Mavericks Using A Flash Drive”
I copy/pasted the Terminal command as shown in the text, and got an error; “You must specify both the volume and install application path”..
Upon comparing your copyable text to the Terminal image, I see the actual command in terminal image has two dashes before ‘volume’ and ‘applicationpath’ where the copyable text only has one. When I placed the two dashes in the command, it worked. May want to revise the copyable text.
Otherwise, thanks for the post!
All fixed. Sorry about that, the characters auto formatted into being a single large dash. Thanks for the heads up on that one!
You can also use the free DiskMaker X mac program to make a Mavericks USB installer disk. It’s a bit easier than having to use Disk Utility and Terminal. DiskMaker X can also make USB installer disks for system 10.8 and 10.7.
I saw this method, too. I liked this method because it requires no extra installation.
I entered the sudo command on termial, after typing in the password, i get this message…
Failed to start erase of disk due to error (-9999, 0).
A error occurred erasing the disk.
how do i handle it…
thank you..
I just did a Google search for your error and this was the first result I received:
https://forums.macrumors.com/showthread.php?t=1649986&page=4
Looks like some good info there, I’d give it a read and see if any of those cases match what you’re doing. It looks like there could be a few reasons that comes up.
Thank u …. ill read it up….
I get an error while trying to wipe out the drive, selecting 1. Partition , get the Partition Failed ” Couldn’t unmount Disk”. So tried Disk erase and I get “Disk erase failed” couldn’t unmount disk. Any suggestions?
What disk are you trying to wipe? I don’t recommend you wipe your main drive unless absolutely necessary, but if you are, you have to be booted from the thumb drive to do it.