
Let’s face it, following the rules isn’t any fun. Nobody likes rules but put them into the OS X Mail client and suddenly rules are a pretty good thing.
Mail rules are instructions your email client follows that tell it how to handle emails automatically. This means you can tell Mail to automatically archive a specific type of email or highlight another so it’s easy to spot. Rules can be kind of tricky to set up, but follow the instructions below to start setting rules in OS X Mail quickly and easily.
Setting Up Rules
First things first, head over to Mail Preferences by clicking on the Mail menu then Preferences. From here click on the Rules tab of the Preferences window. This is where all the current rules will show, if you have any.
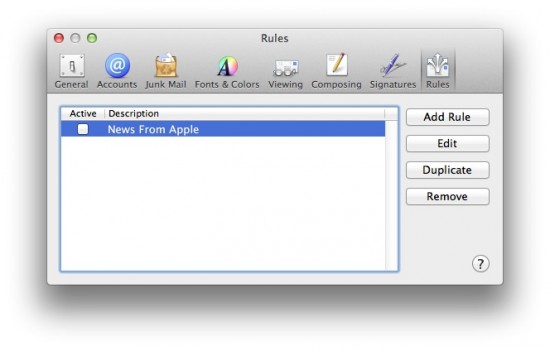 There are two key parts to mail rules: conditions and actions. Basically, conditions are what Mail looks for, and actions are what it does when the conditions are met. Simply put; cause and effect.
To make a new rule, click Add Rule and the new rule window will come up. Now that you’re familiar with what rules are in Mail, let’s show you how they work with a few examples.
1. Stand Out Emails
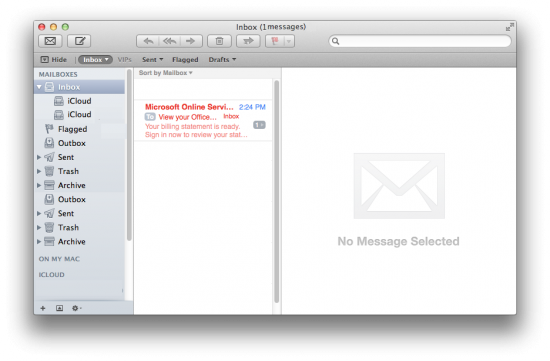
Let’s say you have multiple email accounts all running inside of Mail. With multiple accounts comes quite a few emails, which means seeing those few emails that are really important can sometimes be tricky. The first example rule we’ll look at is how to highlight all emails sent to a specific email account bright red.
If you followed the steps above you should now be in the Add Rule window. The first step is to give your rule a good name so you remember what it is later. Next, set the condition (If field) to be To Is equal to Email Address Here. Replace Email Address Here with the account you want highlighted.
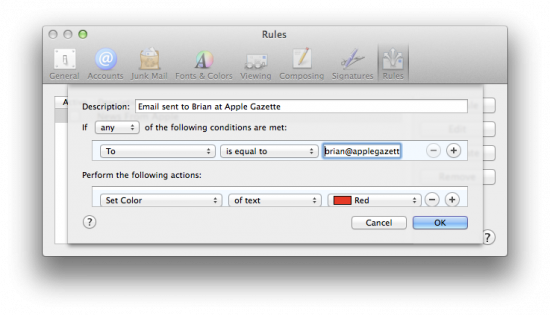
As you can see from the screen shot, the next step is to set the action (perform the following actions field). Change this to: Set Color of text Red. Now just click OK and your new rule is all set.
2. Highlight Attachments
If you use OS X Mail for business, you probably get attachments from time to time that are similar. For example, if you’re a manager that routinely gets timesheets as attachments, you can make these stand out with a simple rule.
We’ll be using two conditions this time to weed out any false positives. First, next to the word If there is a drop down box that by default says any. Change this to say all, so Mail uses all the conditions.
Once this is changed, set the first condition to be Attachment type is Document, then click the plus sign at the end of the line to add a second condition. The second condition should be Any attachment name contains timesheet. This means that the email must have an attachment and the attachment must have the word timesheet in its name.
Finally you can set the action to be whatever you want. In the screen shot below the action is to give these emails a Yellow flag.
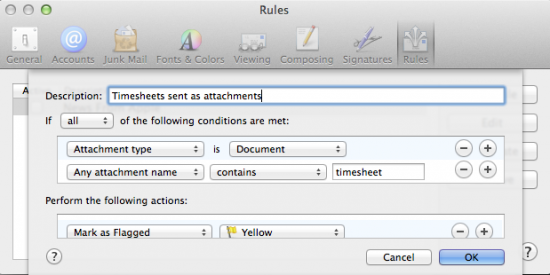
This could be changed to be anything from PDF invoices to birthday invitations. Any attachment type can be highlighted.
Wrap-Up
Rules are a great way of making sure you see the emails you want. Now that you have the basic idea how they work, play around and make some for yourself. Be careful when making new rules, though, as it’s easy to include too few or too many items in a rule, and if you’re deleting or archiving with the rule, you could totally miss important emails.


