
The Network preference pane can be a dark and foreboding place. With some training, you can actually understand what you’re doing when you try and fix your internet connection. Pop open the Network pane found in System Preferences, and let’s explore.
Network Preference Pane
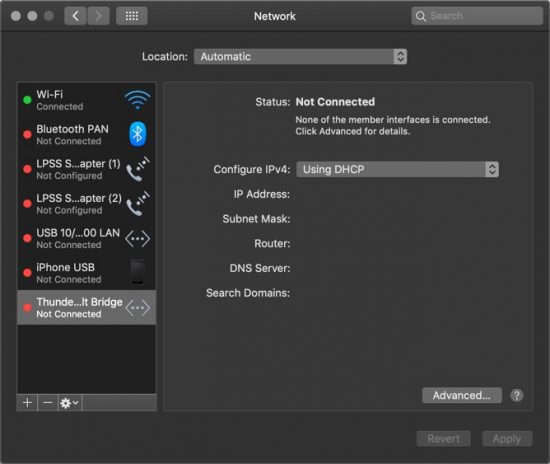
Network options, see on the left side of the Network preference pane in System Preferences, show the available network interfaces on your computer. Even if the network connection is unavailable, disconnected, or inoperable, it will still appear in the sidebar.
Some network connections, like iPhone USB, are automatically generated when you connect your iPhone to your Mac. Some other ones, like Wi-Fi, are built-in. Other ones, like Bluetooth PAN, are almost never used but still automatically generated in case they’re needed.
Whenever you make changes to the network settings, you’ll need to click the Apply button to actually set them in action. You will also be warned when exiting the preference pane if you have not yet saved your changes.
Using the network interface list
To remove unused network connections, select them in the left pane and click the minus (“—”) button. Keep in mind that after you delete an interface, it will need to be manually added back to the list. To add new network interfaces, use the plus (“+”) button at the bottom of the list.
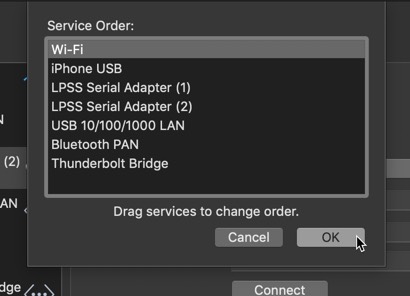
The order of interfaces in the list is important. Your Mac will go down the list from top to bottom, trying to connect to each interface until one works. You can use this to your advantage, especially when setting locations, to ensure that you connect to the right network first.
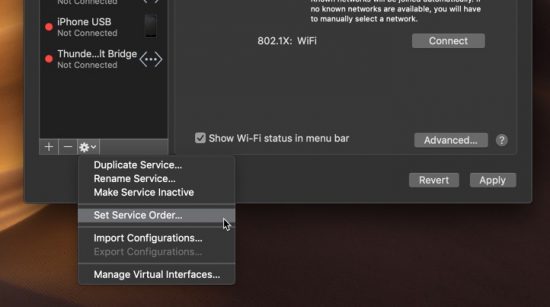
To change your service order, click the gear icon at the bottom of the list and choose Set Service Order from the dropdown. Then drag the interfaces into the order you’d prefer.
From the gear menu, you can also set the selected services as Inactive.
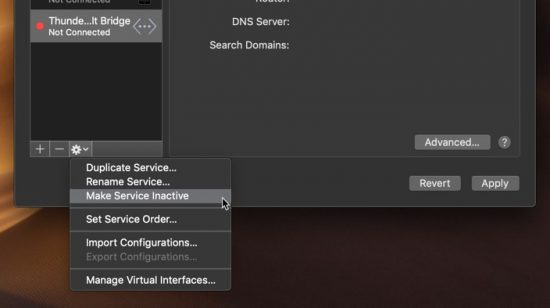
When a connection is inactive, macOS will not attempt to connect to the network through that interface. However, it won’t be removed from the list, allowing you to toggle it back on without re-adding the interface manually. You can also give services new names or important an existing network configuration file.
Locations
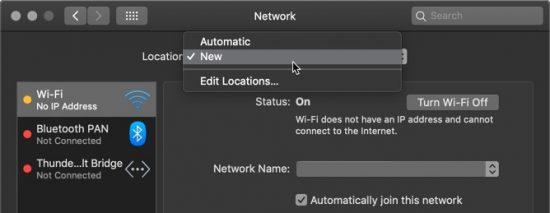
Locations are a tool for macOS to apply different network configurations based on your current location. They can be automatically applied based on the available network connections. This way, your computer can seamless transition between places like work and home. While most people ignore locations, they can be useful for setting different network preferences based on your context.
A practical example of using Locations
Locations are most useful for dynamically preferring different network interfaces based on your location. For example, maybe you connect to the Wi-Fi at home but Ethernet at work. And maybe the Wi-Fi at work is too slow so you want to keep your computer from connecting to it.
You can configure two separate locations for this, one with Wi-Fi first in the service order, and another with Ethernet first. This way, you’ll always get your preferred connection without toggling manually.
You can also use locations to set advanced options, like proxies, DNS servers, network preference order, and workgroup settings. See below for more information on how those work.
Advanced Options
When you have an active network interface selected, you can click the “Advanced” button to see additional options.

We’ll tour through these tabs one by one to review their functionality.

Wi-Fi
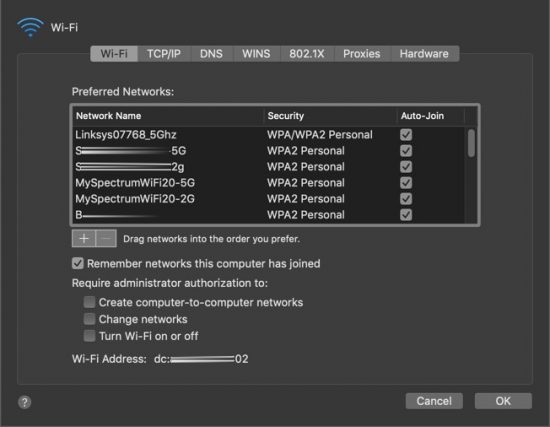
In the Wi-Fi tab, we can set the order in which networks are tested. If your Mac prefers the wrong network, you can fix it by dragging network names around until the order is correct. You can also toggle the Auto-Join function of the networks individually, allowing you to automatically connect to some networks while getting warnings for others. If you never use a network, or you saved a network you didn’t mean to, you can remove it by selected the network’s names and clicking the minus button on the list.
You can also set the global preference for remembering networks with the Remember networks this computer has joined checkbox. Admin restrictions can be set for changing network preferences, and you’ll see your Wi-Fi MAC address at the bottom of this pane.
TCP/IP
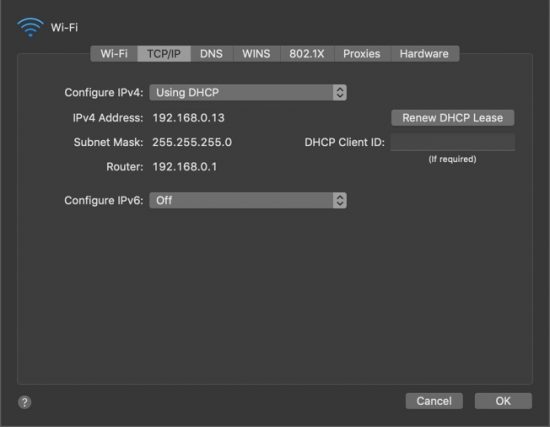
In the TCP/IP tab, you can configure your Mac’s IP addresses. Here, we either choose to use DHCP to allow the router to automatically assign us an IP address. Click the Configure IPv4 dropdown, and you’ll see a few other options too.
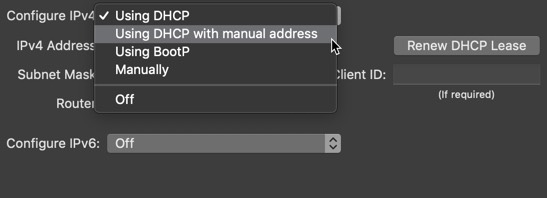
Let’s review what these do:
- Using DHCP: allow the router to automatically assign you an IP address. The best default options.
- Using DHCP with manual address: set your own IP address and request that the router assign us this IP. This works best when you have DHCP reservation for your IP and MAC address on your router. If you don’t have a reservation, there’s a good chance it won’t work at all. If you’re building a media server, this is a key step.
- Using BootP: Use Bootstrap Protocol (BOOTP) to get your IP address. Only use this option if the router is using BootP.
- Manually: type in your own IP address, subnet mask, and router IP address. Most useful when you need to override the router’s DHCP settings, which should be rare. Don’t make a typo!
You can apply the same settings for IPv6 if your router is using IPv6.
DNS
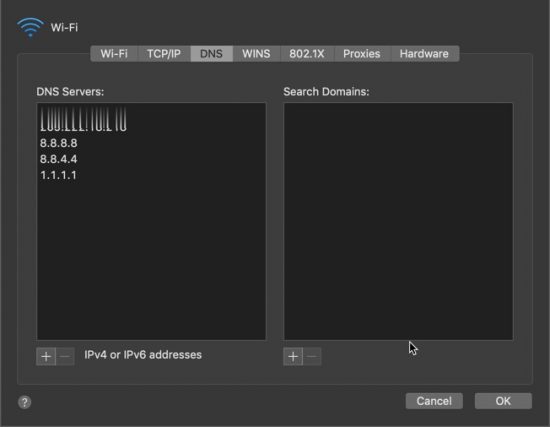
Configure your DNS servers here. The first server in the list will be accessed first, like with network services. To add a new DNS server, use the plus button. DNS search domains can also be configured, but those aren’t typically worth much. If you still have DNS search domains for your ISP, you can remove them by selecting them and clicking the minus button at the bottom of the list.
WINS
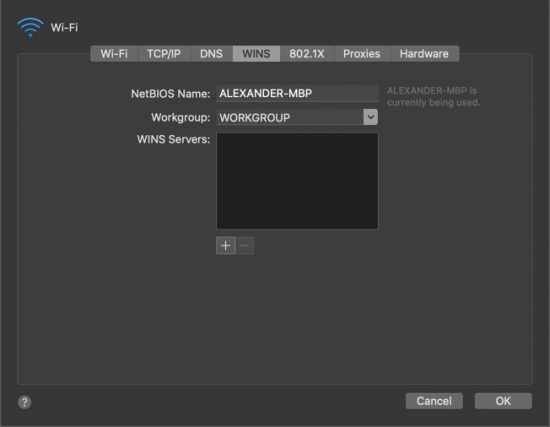
Set your Mac’s workgroup name here. To share files over a workgroup with a Windows computer, both the Mac and the Windows machine must have the same workgroup name. Otherwise, they will appear invisible to each other. You can also change your NetBIOS name and add additional WINS servers with the plus button.
802.1X

If your network uses certificates to save login credentials, you can configure them here. For example, XFINITY public Wi-Fi uses these certificates to save your login credentials, avoiding the reliance on the often-cleared browser cookie cache. This also means the network will be accessible through any application on the Mac, which is superior to saving login credentials in the browser. However, it’s also far harder to configure and can confuse less tech-savvy users, so take caution here.
Proxies
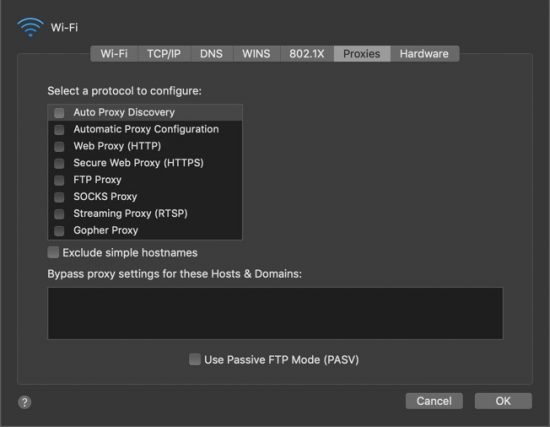
Set up and configure web proxies here. A proxy server is like a hub through which certain network requests are sent. With a proxy, the receiving device sees the IP of the proxy, rather than the IP of the original requestor.
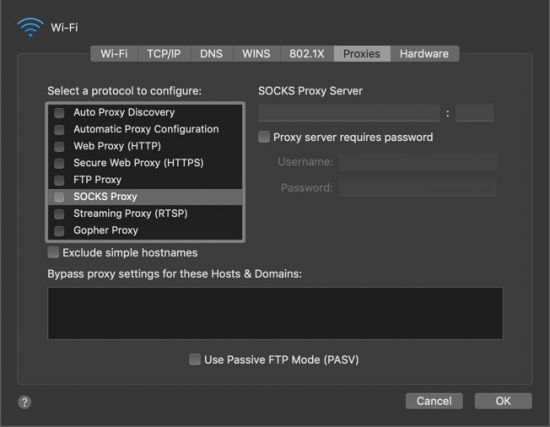
To add a proxy, select the appropriate interface from the list and entire the IP and port number of the proxy server, along with any authorization credentials necessary.
Hardware
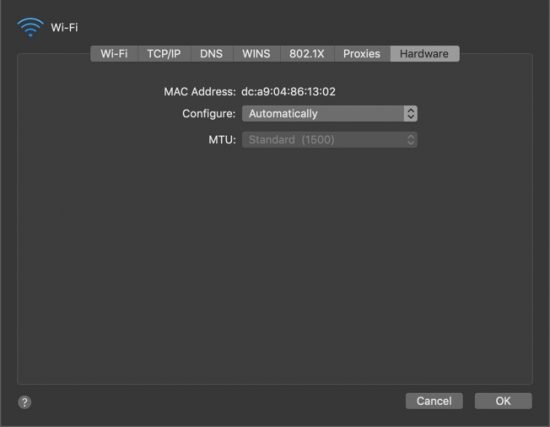
This tab displays your current network connection’s hardware profile. On a Wi-Fi connection, you’ll see the MAC address. You can also manually configure the MTU (maximum transmission unit) by changing the the Configure dropdown to Manually and selecting an MTU size from the dropdown menu. The MTU should be set based on network activity and processing overhead, which means it’s typically best to let the router set it automatically.
You might also like the following posts:
