
Boom is a little unique as an application. It’s a software audio interface that sits on top of your existing audio stack, applying sonic adjustments as requested. By installing kernel extensions, it can insert itself between your audio source (iTunes, perhaps) and your audio output (your speakers) and make modifications to the sound.
Boom started life as a Mac app designed to boost the often-disappointing output of the MacBook Pro’s speakers. Since then, it’s expanded into a fully-fledged audio enhancement suite, including custom equalization, specialized presets, and even per-file audio sweetening. If you want better control over your system’s sound, its an excellent addition.
Installation & Setup
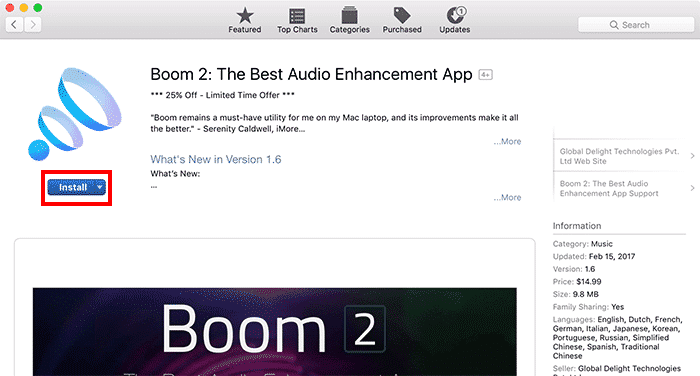
1. Download Boom 2 from the Mac App Store.
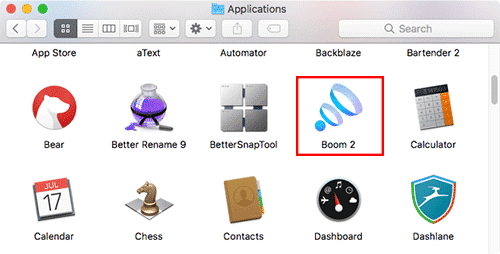
2. Open Boom from the Applications folder.
3. Before you start using Boom, you’ll need to download and install an optional Boom 2 audio component. In the primary tab, click “Learn More” to navigate to the developer’s website.

4. Then, click “Download” to download Boom 2’s additional audio component.
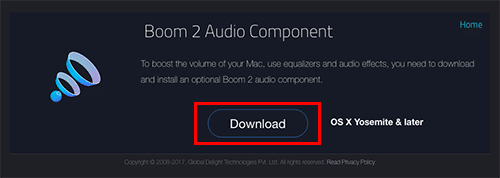
5. Run the installer for the audio component. When it’s finished, you’ll be able to use all the features of Boom 2.
Increasing Volume with Boom
Boom’s primary function is to increase the output of your Mac’s speakers. It does this by applying an additional volume slider, called “Boom Volume,” which has a much higher maximum value than your system’s default Volume slider. The two work independently. You’ll probably want your system’s volume set to the max to get the most benefit from Boom.
1. Locate the Boom icon in the menu bar.
![]()
2. Click on the Boom icon, then drag the Boom slider up and down to adjust the separate Boom volume.
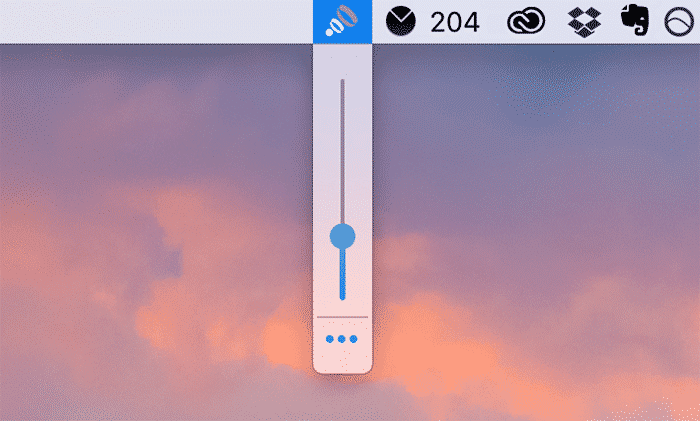
If you start to hear any distortion from your speakers, turn down the Boom volume slider immediately. Unlike the Mac system slider, the Boom slider can get loud enough to permanently damage your speakers if you’re not careful.
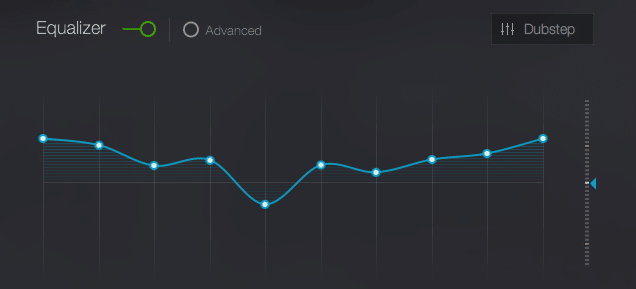
Sweeten Your Sound with Equalization Presets
Equalization, or EQ, is the process of increasing or reduce the volume of specific audio frequencies within an audio file. For example, if you want to pump up the bass, you’ll increase the low frequencies using an equalizer. For more definition, you’d increase the high frequencies, and for better vocal clarity, you’d focus on the middle frequencies.
By default, the Mac doesn’t include any kind of audio sweetening or equalization component. Fortunately, Boom 2 addresses that. Since it inserts itself between the audio source and the audio output, it can apply an equalization curve on audio from any application. Use the equalizer presets to select one based on the music you’re listening to. You’ll find expected standards like Rock, which drops the mids while raising the highs and lows, and Pop, which does almost the opposite. Experiment with the presets you like for the music you listen to.
Applying Custom Equalization Curves
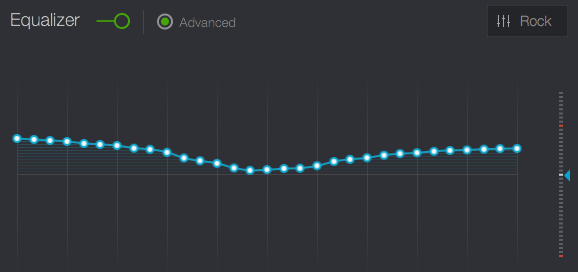
In addition to using the built-in equlization curves, Boom allows users to tweak existing presets and build their own. Just by dragging to small blue dots around, you’ll modify the sound. Make small adjustments at first: Boom makes it easy to create curves that will destroy your headphones if you’re not careful.
Tick the “Advanced” radio button at the top of the equalizer module to access more control points. When you’re done making changes, you’ll be prompted to save your preset. Either create a brand new one, or overwrite the existing preset, depending on your preference.
Using Boom to Customize Sound
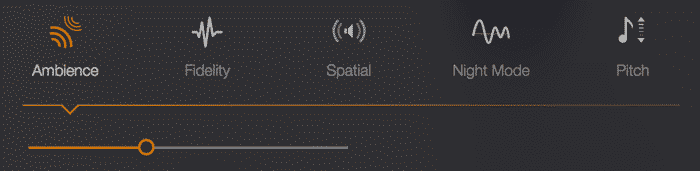
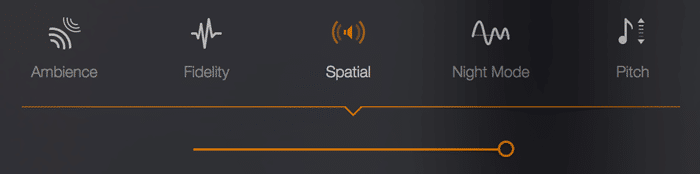
In addition to specific equalizer curves designed for certain genres of music, you can also apply functional EQs designed to manipulate your sound in specific ways.
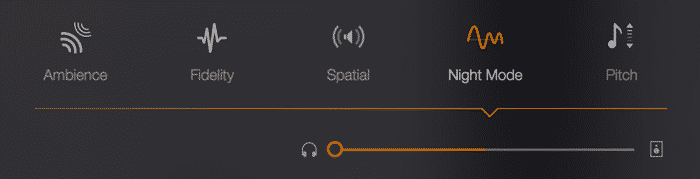
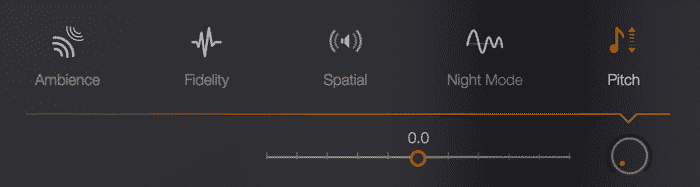
If you look below the equalizer adjustment pane, you’ll see five buttons, labelled “Ambience,” “Fidelity,” “Spatial,” “Night Mode,” and “Pitch.” These somewhat-cryptic names apply different audio effects to your output.
Ambience adds a small amount of reverb, or echo, to your audio output. This makes music and speech sound more naturalistic, like it’s being played in a three-dimension space. This can sweeten less-than-perfect audio on headphones, but you probably don’t want to apply it to music or audio played from speakers.
Fidelity boosts the low and high end of your frequency spectrum, increasing both subs and splash.

Spatial separates the stereo channels of your audio, increase the size of the “sound stage,” and adds a slight reverb.
Night Mode reduces the volume of your sound drastically and applies an EQ curve designed to make the sound less disruptive for your neighbors.
Pitch exposes a slider that allows you to raise and lower the pitch of audio output. This is a pretty technical requirement, but it’s awesome to see a technical adjustment like this in consumer-level audio processing software.
Conclusion
Boom offers a lot of control over your system sound, especially outside of iTunes. It’s the only app we’re aware of that applies a decent EQ curve to any and all audio sources, and audiophiles might appreciate the fine degree of equalization control available. The built-in presets are reasonable and the listening modes can be helpful, but Boom is really all about creating custom equalizations. Just be careful not to blow out your speakers!

2 thoughts on “Get a Powerful Mac Equalizer with Boom 2”
Does it also work with the headphone/line out of the Mac?
It should! I use it personally on my Macs for headphone output. You can also use it over USB audio interfaces and just about any other audio output method.