
When your Mac is brand new, the context menu is clean. And for the most part, it stays that way. But if you want to add or subtract to it, you have some limited flexibility to edit the macOS context menu.
Show and hide services
The primary method for adding and removing context menu items from macOS’s context menu is through what are called services. If you’ve ever experimented with Automator, you know you can make your own services and add them to the right-click menu. Applications also create their own custom services, which you’ll find in the same place.
These services appear under the “Services” dropdown in the right-click menu, at the bottom of the menu. You can use a System Preferences pane to add and remove Services from the context menu.
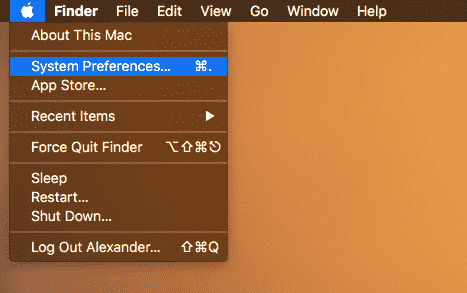
1. Click on the Apple menu and open the System Preferences application. You can also open it from /Applications/System Preferences or through Spotlight.
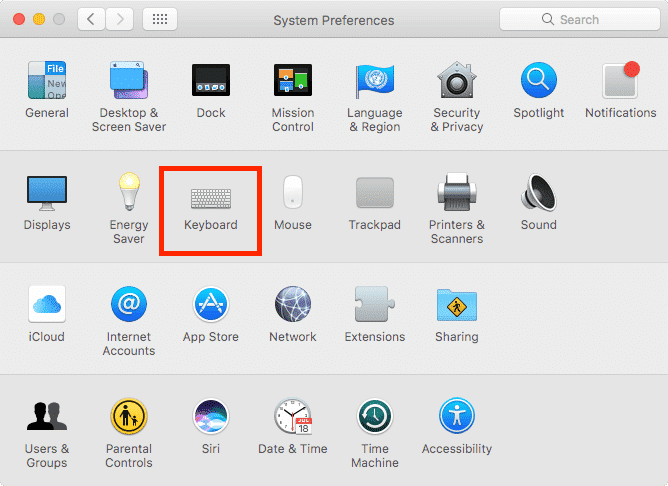
2. Open the Keyboard preference pane.
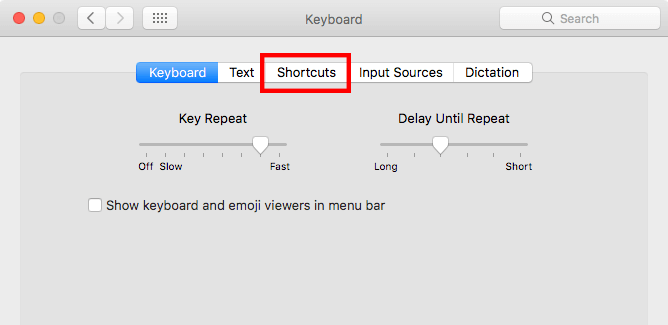
3. Click the Shortcuts tab.
4. Select Services from the menu pane on the left-hand side.
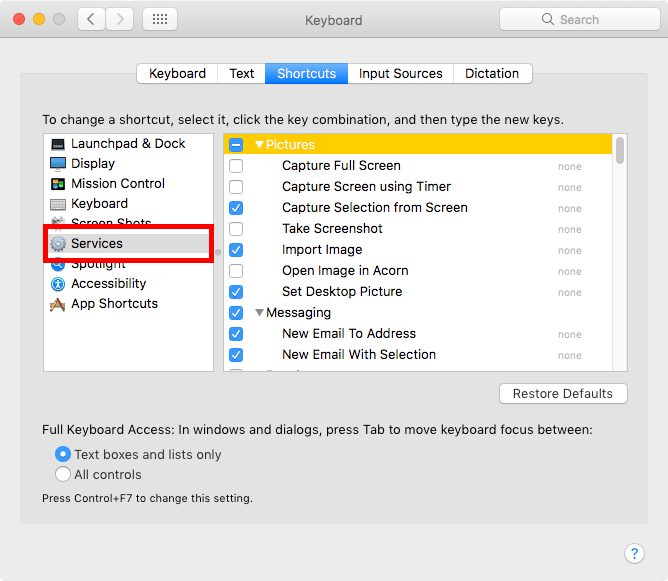
5. This will reveal a list of all available services, sorted into basic categories based on the type of input the services operate upon. As you might expect, you can use the check boxes to toggle the visibility of the connected services.
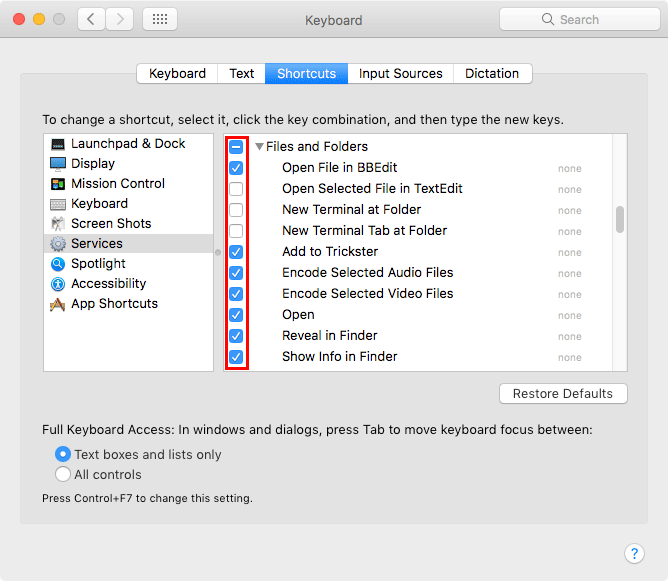
6. Some Applications automatically turn on their own services, and you can use the check boxes to turn them off. Some applications install services but don’t enable them. You might find a few useful services here that you never knew about.
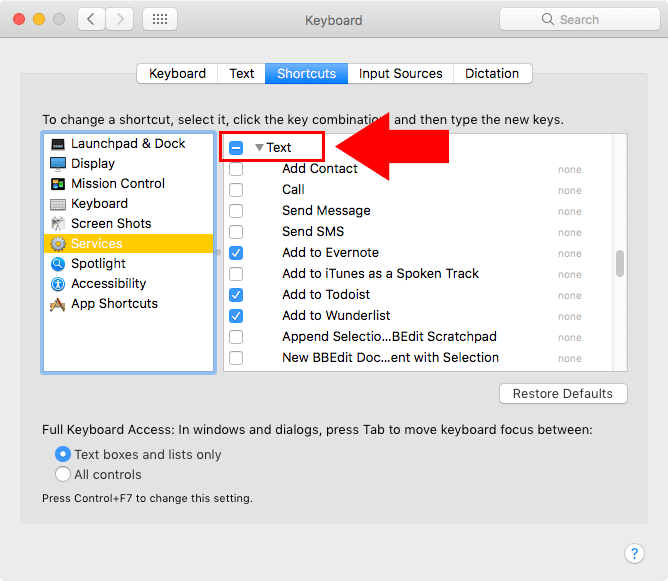
You’ll find services based on what kind of item (file, folder, text) the context menu item takes as input. For example, if a context menu item appears when you right click on selected text, you’ll find the Service under the “Text” dropdown.
Show all Services in the primary context menu
If you have a lot of Services or you use them frequently, using the secondary menu can be annoying. If you’d like to save some time, you can set all enabled Services to appear in the primary macOS context menu with a Terminal command.
1. Open Terminal at /Applications/Utilities/Terminal.app.
2. Paste the following command into Terminal:
defaults write -g NSServicesMinimumItemCountForContextSubmenu -int 999

This command will edit the number of Services entries required to spawn the”Services” submenu. The number at the end of the command (999) represents the number of items required to create the Services submenu. If the numbers of Services is less than this value, you won’t see the Services submenu. 999 is as close to infinite as we need to go, so this command will never show the Services submenu.
3. Restart Finder to see your changes with the Terminal command below:
killall Finder

Edit the “Open With” Menu
One submenu in the context menu, the “Open With” menu, can get pretty long after you’ve had your Mac for a while. You can some limited customization options you can take advantage of here, either to remove duplicates or specifically change entries.
1. Remove duplicates from the “Open With” menu
The LauchServices database, which managed the “Open With” submenu, can get corrupted. This causes persistent duplication of applications listed in the Open With submenu. To remove those duplicates, you can rebuild the LauchServices database from scratch.
1. Execute the Terminal command below to rebuild the LaunchServices database:
/System/Library/Frameworks/CoreServices.framework/Frameworks/LaunchServices.framework/Support/lsregister -kill -r -domain local -domain system -domain user

2. Relauch Finder with killall Finder. If you don’t see any changes, try restarting Finder again in a minute. It can take a few minutes to rebuild the LaunchServices database.
2. Manually ban apps from appearing for specific file types
Some apps are pretty liberal with the applications they associate with. You’ll find Adobe programs cluttering your Open With menu for almost every extension on your machine. You can manually stop this by preventing applications for associating with a given file extension. This isn’t the same as changing the default application the file opens with, and it takes a little preference hacking. Only proceed if you feel confident editing plist files.
1. Navigate to the application you want to ban. Right-click on the application and click Show Package Contents
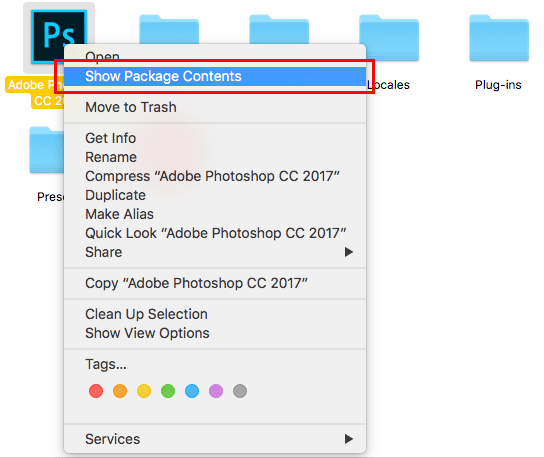
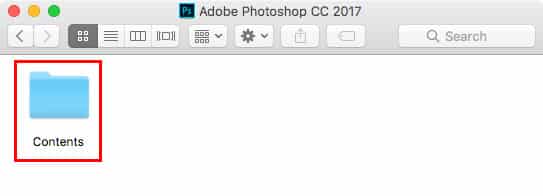
2. Open the Contents folder within the application package.
3. Duplicate the Info.plist file and rename the original to something like info.plist.bak to create a backup file. If you mess up the edited plist file, just delete the damaged file and remove the extension from the backup plist.
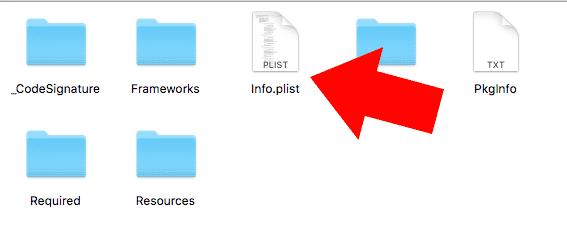
4. Open Info.plist in a text editor like TextEdit or BBEdit.
5. Search the document with Command + F for the following: CFBundleTypeExtensions. This is how the plist indicates files that it will open for.
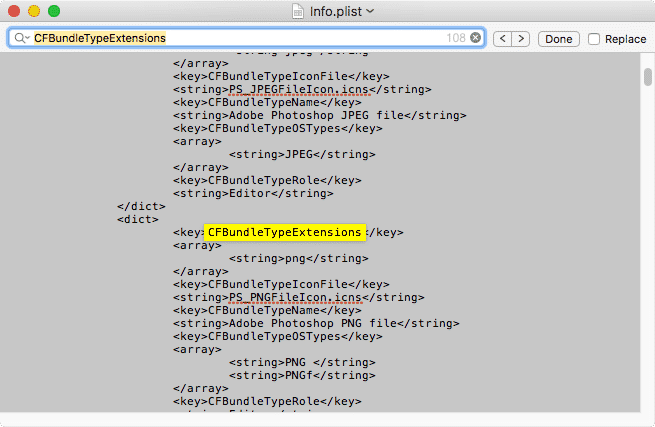
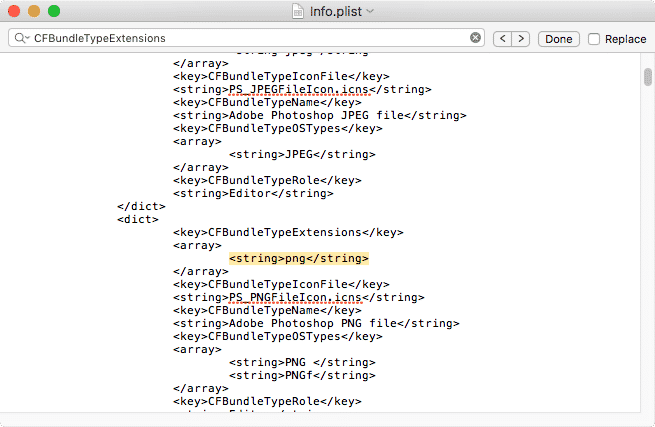
6. This string will show up a lot. Find the <string>…</string> that contains the extension you want to ban. To remove Photoshop from the Open With menu for PNG files, for example, find <string>png</string> under CFBundleTypeExtensions.
7. Delete the appropriate <string>…</string> entry and save Info.plist.
8. Open Terminal and run killall Finder to apply the changes.
3. Add apps to the Open With context menu
You can use the same trick to add applications to the Open With menu for file types they wouldn’t typically associate with.
1. Follow the steps above to get to the Info.plist file you want to edit.
2. Open the file in a text editor and add the following lines at the bottom, but above the </plist> closing tag. This will make the app associate with PNG files; change the text between the string properties to the appropriate extension.
<dict>
    <key>CFBundleTypeExtensions</key>
    <array>
        <string>PNG</string>
    </array>
</dict>
You might also like the following:

One thought on “How to Customize the macOS Context Menu”
I typed these terminal commands and now my icons and apps are corrupted. thanks…