Many users face problems when videos won’t play on Apple devices. As a result, watching videos becomes frustrating if files get corrupted or unsupported. However, learning Mac video repair methods can save time and prevent data loss. Alongside this, easy-to-use tools and simple steps can fix videos without losing important data. This guide explains the causes why iPhone or Mac videos fail on devices and their solutions.
Part 1. 5 Common Reasons iPhone Videos Won’t Play on Mac
Sometimes, an iPhone video not playing can be stressful when urgent videos refuse to open on a Mac. This part explains reasons why iPhone videos fail, helping you understand playback issues:
- Format Conflicts: New iPhones use HEVC (H.265) and HEIF formats that older Macs cannot decode. QuickTime or Photos refuse these containers, making iPhone videos appear unsupported or broken.
- Hardware Limits: 4K 60fps videos require more processing power; older Macs may struggle. Older machines cannot decode large files, which causes stuttering and prevents video playback.
- System Issues: Low disk space or malware can block proper video playback on a Mac. Network or browser glitches also prevent iPhone videos from loading completely.
- Outdated Software: Outdated macOS or QuickTime will fail to play modern iPhone formats. Such devices produce errors because HEVC/HEIF media requires recent software support.
- App Limitations: QuickTime only supports certain codecs, failing with unsupported formats like WebM. Outdated or damaged apps cannot recognize new iPhone video formats, stopping playback.
Part 2. 5 Essential Features to Look for in Video Repair Software
When urgent files fail, Mac video repair tools become essential for quick recovery. So, below are key features that help you choose reliable video repair software with ease.
- Format Support: Good tools support MP4, MOV, AVI, and MKV formats from phones, cameras, and drones. Wide support prevents playback errors and lets repaired videos open on Mac.
- Damage Repair: Strong software fixes broken headers, missing frames, sound errors, and sync problems. This feature restores damaged videos, so files play after the repair process finishes.
- AI Mode: Advanced modes analyze samples to rebuild missing parts from damaged videos. AI repair increases the success rate and improves the final video structure stability.
- Batch Processing: Batch repair fixes multiple videos at once, saving time and effort. This function helps users manage large projects without repairing clips one by one.
- Preview Option: The Preview feature shows repaired results before saving, to confirm quality. It avoids exporting unusable files and ensures Mac videos remain clear after repair.
Part 3. Try Repairit First: The Smart Choice to Recover Damaged Videos Quickly
The effortless and best solution to repair damaged or corrupted videos is Repairit. This advanced tool uses AI-powered technology to repair corrupted videos. It supports over 25 major and popular video file formats, including AVI and MOV. You can also use reference files from the same device to repair severe corruption. The Mac video repair tool even lets you repair multiple damaged video files at once.
It automatically detects video problems before repair and selects a suitable fixing method. Repairit prevents further damage to the original videos during the repair processing stages. Users can repair videos with missing audio tracks, restoring a complete playback experience. Moreover, it rebuilds broken video structure, so files become playable again without issues. In addition, it even repairs 4K resolution videos without reducing sharpness or playback.
Key Features
- Codec Support: Supports modern codecs, ensuring repaired videos play on updated systems everywhere.
- HDR Repair: Repairs HDR and LOG footage and preserves dynamic range and color accuracy.
- Large Files: Supports large video sizes without failing during repair or export processes.
Step-by-Step Guide to Fix Damaged Video Files on Mac via Repairit
Take the guidance below to learn how you can repair your corrupted videos using Repairit:
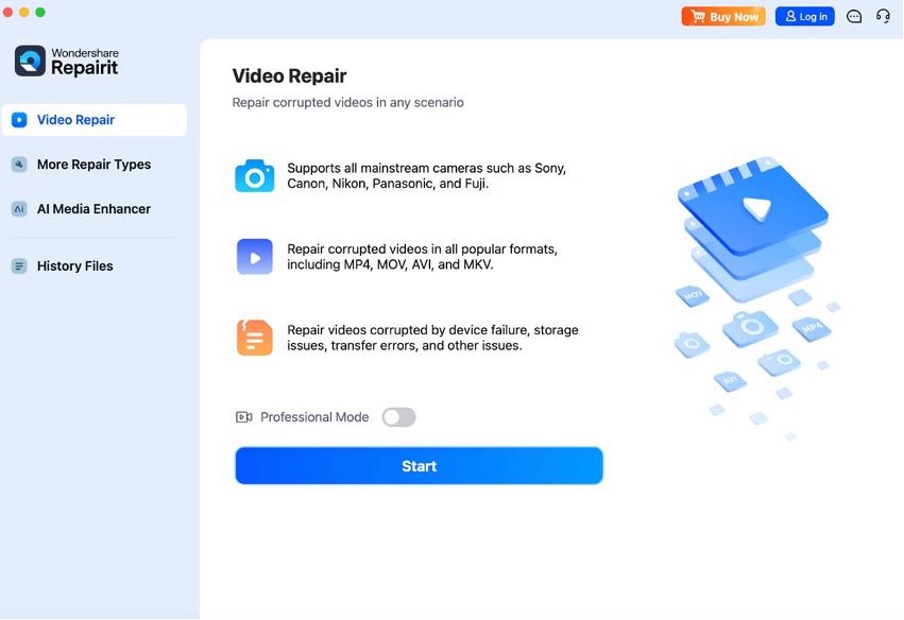
Step 1. Import Your Damaged Videos in Repairit
After accessing the tool, open the “Video Repair” section and click the “Start” button.
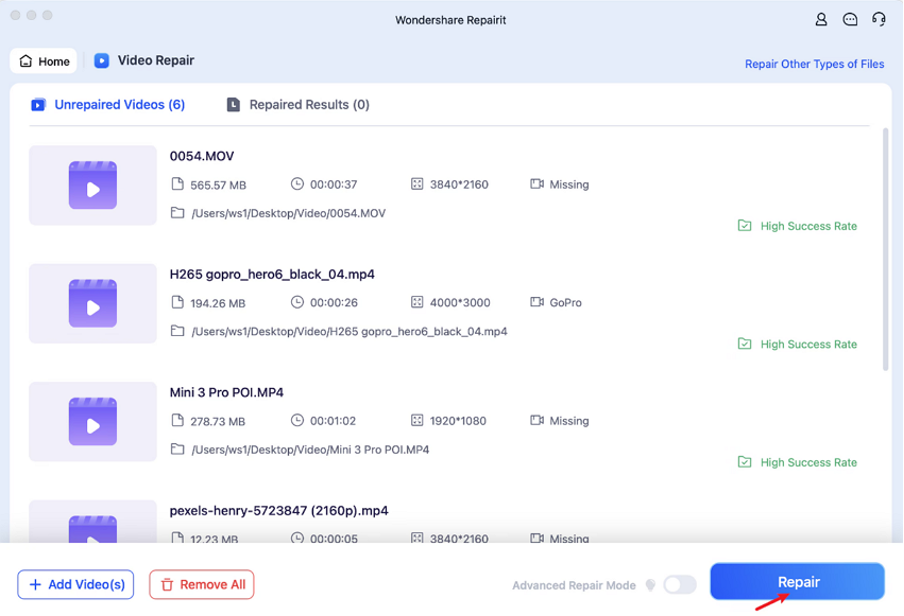
Step 2. Fix Your Corrupted or Broken Videos
When the damaged files are added, press the “Repair” button to begin fixing them.
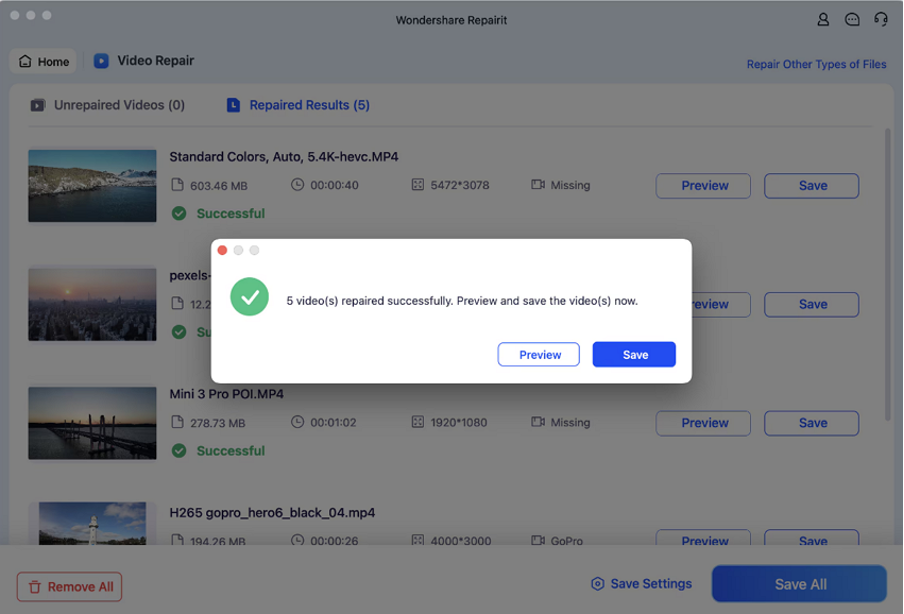
Step 3. Preview or Export the Repaired Videos
Once your videos get repaired, press the “Preview” button to check the results for accuracy. When you preview videos, click the “Save” button to store them on your system.
Part 4. Other Basic Solutions to Try for Fixing Video Playback
When an iPhone video not playing while you’re working, quick fixes become important. Thus, this part explains simple solutions you can try to fix playback problems with ease:
1. Restart the Mac and Reconnect the iPhone
A simple restart clears hidden glitches, stopping videos from loading on Mac systems. It also rebuilds device links so Mac detects iPhone storage and media again. Because stable links matter, Mac video repair works better after the connection completes. So, follow the given instructions below to learn how to restart your Mac:
Instructions. To initiate, click the “Apple” icon and select “Restart” from the drop-down menu to restart your Mac. Following this, make sure to reconnect the iPhone using the USB-C or lightning cable, as appropriate.
2. Try Opening The Video In QuickTime or the VLC player
Sometimes, iPhone video not playing happens when a media player cannot read the file. Therefore, trying another player, like VLC, helps show whether the problem is the file or the player. Also, QuickTime supports standard formats, while other players handle unusual codecs and damaged indexes. If videos play elsewhere, file is fine, and the first player lacks support. However, if it fails everywhere file is damaged and needs repair software help.
3. Convert Video To A Compatible Format
You should also convert videos when formats cause playback errors on Mac devices. Therefore, changing format replaces unsupported codecs with compatible ones, improving playback stability. Tools like CloudConvert reencode files into standard structures, fixing glitches and errors. This method supports Mac video repair when issues relate to compatibility limits. Follow the given steps to change the video format via an online tool:
Step 1. Upon accessing CloudConvert on your browser, click the “Select File” button. After that, select your desired video format like “MKV” from the “Drop-down” menu.
Step 2. After adding the video, press the “Convert” button to convert it to a compatible format.
4. Re-Download The Video From iCloud Or The Original Source
Another way to fix iPhone video not playing is by re-downloading files from iCloud. Fresh downloads replace incomplete or corrupted copies that cause playback errors and glitches. This ensures files are fully transferred without missing headers or broken data sections. So, go through the given guide to re-download the video from iCloud to resolve the playback issue:
Instructions. Visit to the official webpage of “iCloud” and sign in with your “Apple ID” and “Password” to access your iCloud account. Next, go to the “Library” section and click on the video, then opt for “Download.”
5. Check for Software Updates for macOS and Video Apps
If recent fixes fail, updating macOS and video apps often resolves playback problems. Software updates improve format compatibility, codec support, and video performance. Bug fixes reduce crashes, missing audio, or speed glitches in QuickTime and other players. Updates also enhance hardware acceleration and support high-resolution or streaming files. This supports Mac video repair by ensuring apps handle newer formats.
Update macOS
Step 1. To initiate, click the “Apple” icon and select “System Settings.”
Step 2. Next, go to the “General” section and opt for “Software Update” to check for available updates. At last, click “Update Now” to start downloading if an update appears.
Update Video Apps on iPhone
Step 1. Look for the App Store on your iPhone and tap the “Profile” icon on the top-right. Navigate to the “Apps” option on the next window to find the video app that needs to be updated.
Step 2. As you scroll down to the right application, tap the “Update” button to initiate.
Conclusion
In conclusion, iPhone videos often fail on Mac due to various issues. This includes outdated software and corrupted files, causing frustration and workflow delays. Understanding common causes and simple fixes can save time and prevent data loss. For persistent problems, reliable Mac video repair tools are essential. Therefore, Repairit offers an AI-powered solution to recover damaged or unplayable videos.
