

MacOS’s Automator is a little-known but highly useful piece of bundled software. Designed to bring software automation to non-programmers, Automator workflows use a simple grammar that will be familiar to any user of IFTTT. By adopting an “if this, then that” approach to managing complex tasks, it makes it easier for non-expert users to set up reasonably complex processes.
It’s actually not that different from AppleScript. It has a much smaller set of possible operations, but since Automator workflows are made from built-in processes, it’s easier to chain things together than to try and use AppleScript’s extensive dictionary of user-supplied functions.
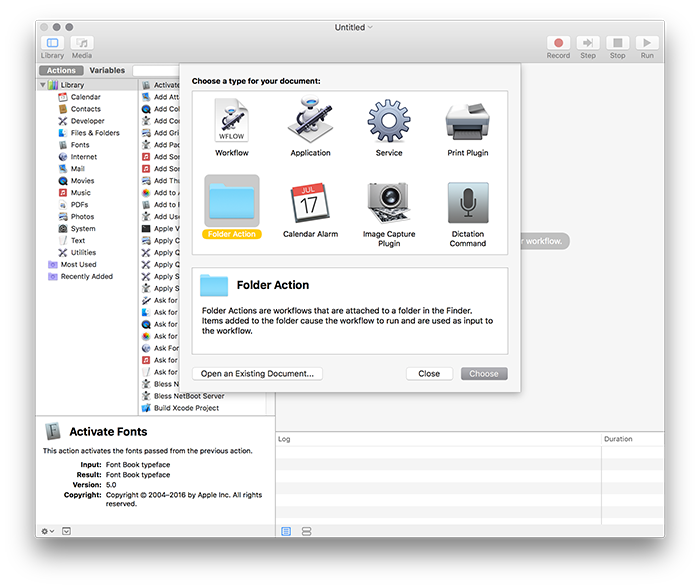
Situation 1: Resizing Images with Automator Workflows
Resizing images is one of the more tedious tasks you can undertake on a computer. While many image editing programs include built-in batch functionality, it can be difficult to get a handle on how they work. Nothing beats the simplicity of dropping files into a folder, and it’s perfect for getting images ready for email distribution.
First, let’s start by creating what Automator calls a “folder action.” This is an action that’s run on any file added to a given folder, like a workflow attached to a specific directory.
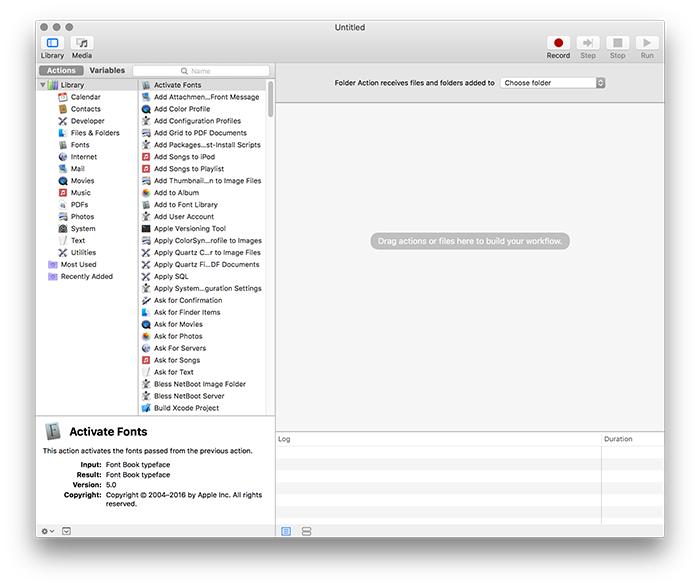
At first, we’ll have nothing in our queue. We need to start grabbing things from the sidebar to build our Automator workflow.
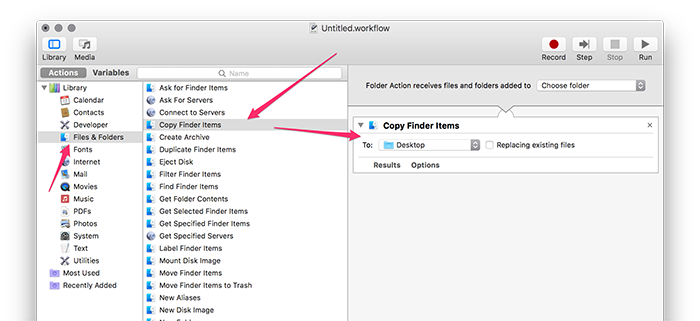
The first thing I want to do is duplicate my files. I could just edit the originals, but if I make a mistake, it will be good to have a backup. To find this action, I’ll click on “Files & Folders” in the left-most sidebar, then drag in “Copy Finder Items.” The only meaningful parameter this step takes is the location that the files will be copied to. I’ll leave it as Desktop, but change it to anything you’d like.
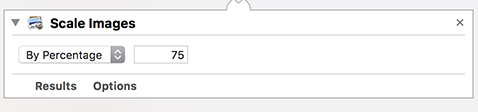
Now let’s get to the actual action. We’ll resize the images using “Scale Images,” located under “Photos.”
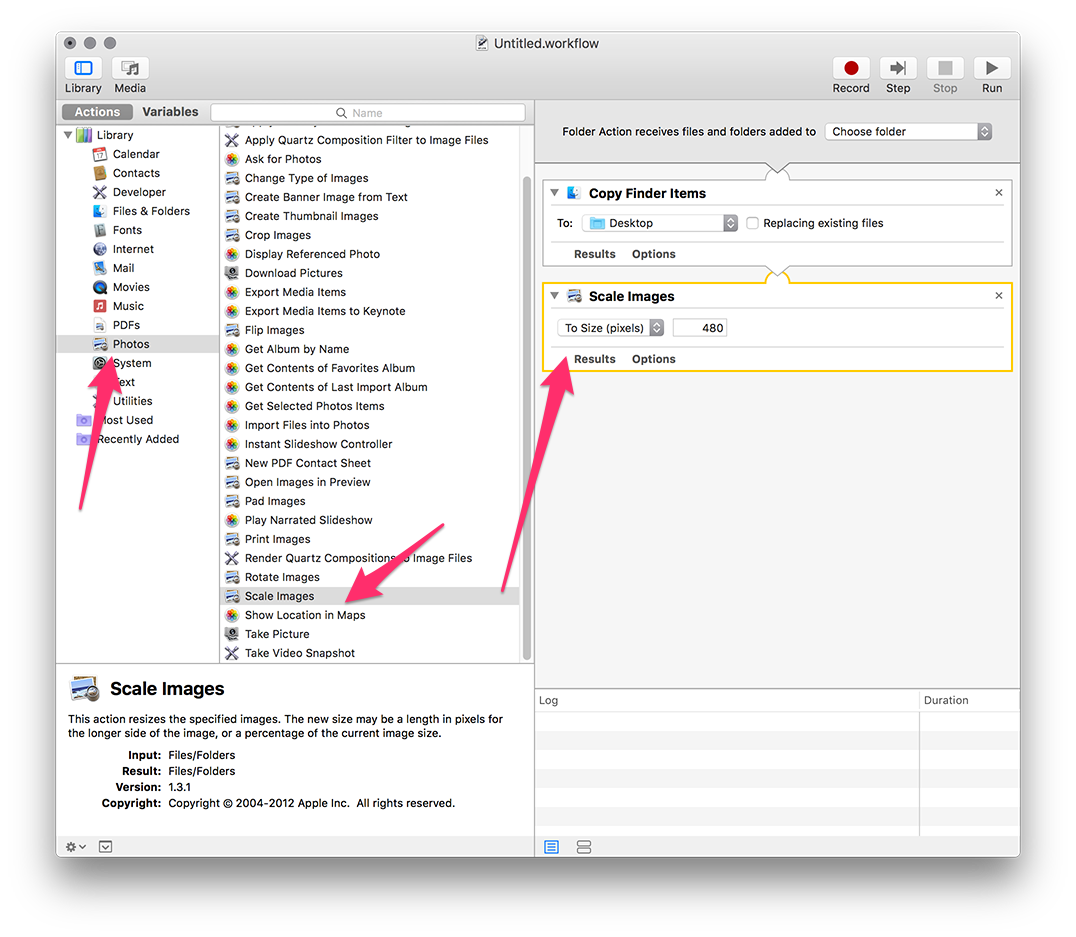
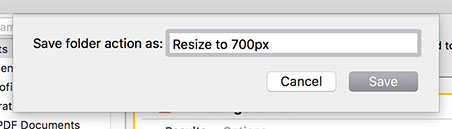
Now we’ve got to decide what size these images should be scaled to. I’m going to set this to 700px, which resizes the images to fit within a 700x700px box. Essentially, the longest edge of the image will be resized to 700px.

Of course, this will both upsize and downsize images, depending on what size they start at. If you want to instead resize the image based on its original size, you can use the percentage function. This allows you to adjust images by a fixed percentage.
You might think the next step is saving the images, but I actually don’t need to. They’ll be saved automatically as they are resized.
Lastly, I’ll need to choose the folder I want this action to operate on. I’ll click the dropdown labeled “Choose folder” in the upper-right, select “Other…” and then chose my folder from the Finder window.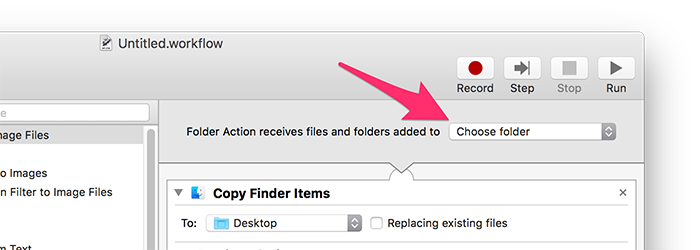
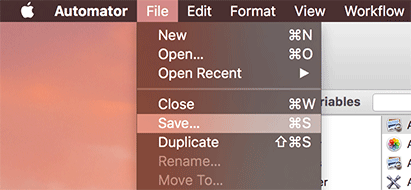
Now that I’ve set all my parameters, I need to save the action. I’ll choose File > Save…
Finally, name the action.
The save location is a little obscure. Automator folder actions are saved in ~/Library/Workflows/Applications/Folder Actions under Sierra, or ~/Library/Workflows/Folder Actions is previous versions of macOS. If you need to modify or edit the action, you’ll find it there. Of course, you can also use the File > Open Recent menu option in Automator itself.

Now any image file that we add to that folder will be resized to fit within a 700px box.
Situation 2: Combining PDFs in Finder
You can also add custom context menu items with Automator workflows. The context menu is what shows up when you right-click on something, and it’s sensitive to both what you’ve clicked on and what application you’re using.
Automator calls these right-click actions “Services,” so we’ll create a new Service.
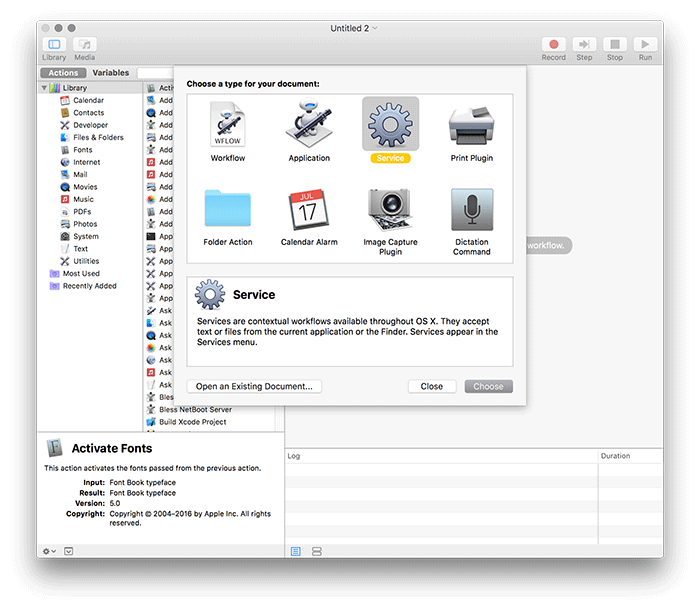
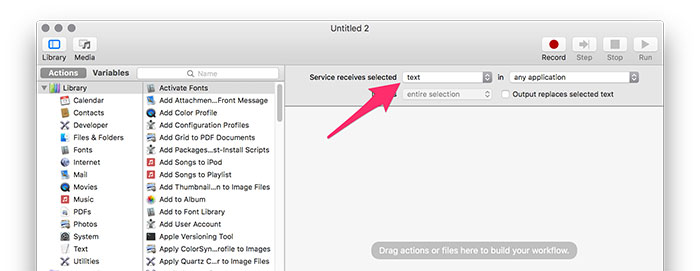
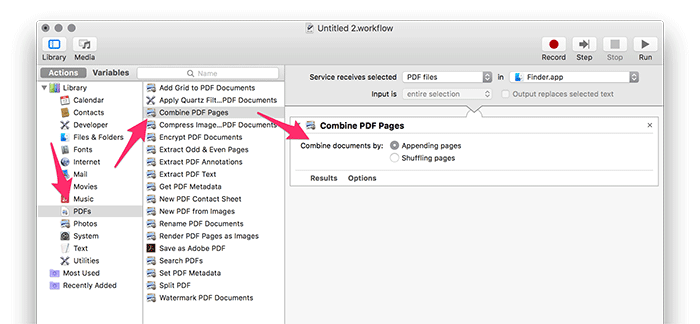
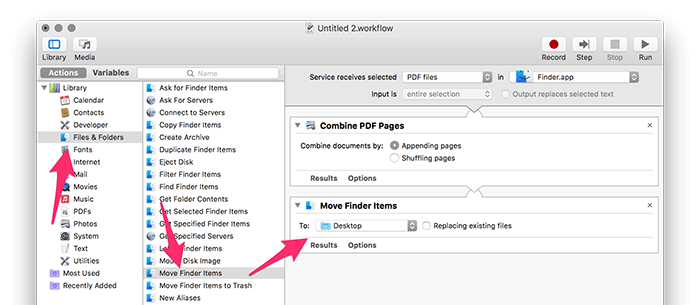
In the new document, my first step is to select the kind of files I want this action to be run on. I’ll click the dropdown that currently says “text” and change it to “PDF files.”

I’ll also limit the scope of the actions to Finder by clicking the “any application” dropdown next to it and selecting Finder.app.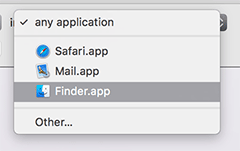
Now, we’ll drag in our first block, “Combine PDF Pages.” Predictably, this can be found under the “PDFs” category.
Next, I’ll grab “Move Finder Items” from “Files & Folders.” This will take the combined PDFs and put them somewhere. In this case, I’ll set it to my Desktop, but it can be anywhere.
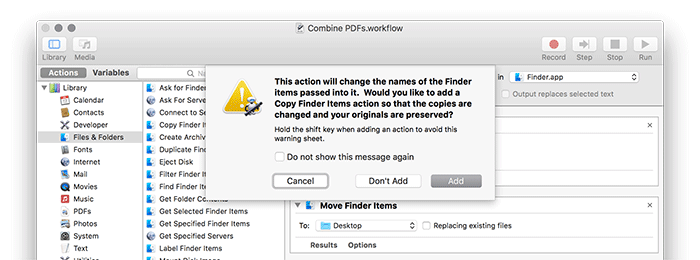
Finally, I want to rename these files, otherwise they’re named with a random six-character string, which isn’t too helpful. I’ll grab “Rename Finder Items” from under “Files & Folders” and bring it into my workflow.
When I do this, I’ll get a fun little warning about how this will change the files and I should add a “Copy Finder Items” action to avoid this. I do want to modify the “original” newly-combined PDF file, so that’s cool with me. I’ll click “Don’t Add” to avoid adding an unnecessary copy action.
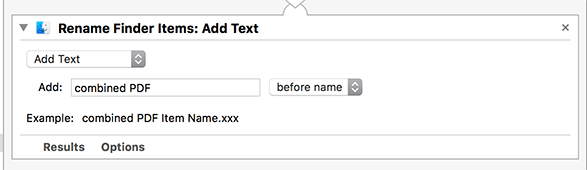
I’ll set up my rename parameters to append “combined PDF” to the front of every file that runs through this action.
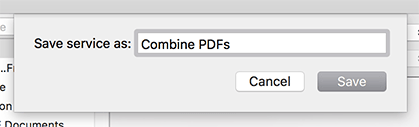
Finally, I’ll save the service as Combine PDFs.
To access this action, right-click on two or more PDFs. Then, mouse down to the “Services” section of the context and click on our new “Combine PDFs” item. After a few seconds, the renamed, combined PDF will show up on your Desktop.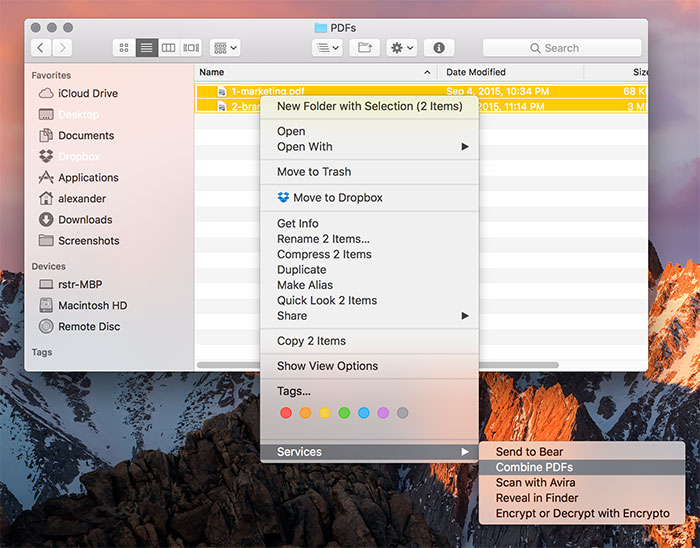
If you need to edit this action, you’ll find it under ~/Library/Services.
Conclusion
Obviously, this is only the briefest introduction into Automator workflows. It’s not the most capable automation utility on your machine—that award goes to AppleScript—but it can make a lot of tedious tasks a little less painful. Take the time to explore its many options, and you might find yourself saving a lot of time.
You might also like:
One thought on “Getting Started with Automator on Your Mac”
uhhh… not so sure I would be encouraging users to rely on Automator any longer…. https://daringfireball.net/linked/2016/11/16/sal-soghoian