When you’re working hard, it’s easy to get overwhelmed by several applications with multiple windows each. Stay organized with these macOS window management and workspace organization tools.
Mission Control
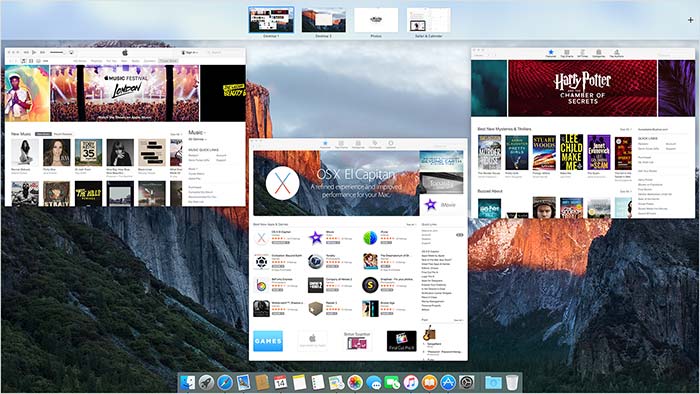
Long time Mac users might know Mission Control well, since it was first introduced way back in OS X Lion. And yet, if anecdotal evidence counts for anything, this macOS window management tool get precious little use. It’s a shame, because if you’re trying to stay organized on macOS, Mission Control is absolutely essential.
Mission Control creates multiple virtual desktops, called Spaces, and let’s you quickly toggle between them with trackpad gestures and keyboard commands. Organized users can group application by theme, function, or purpose, and then quickly slide between virtual desktops as needed. Full Screen apps each get their own space too, so users can easily slide between multiple Full Screen apps.
Mission Control’s other feature, once called Exposé also makes it easy to see all your currently open windows at once. When triggered, it quickly “explodes” your current desktop, showing you all the open windows. This way you can quickly find what you’re looking for. Even if you don’t like Spaces, this feature is invaluable.
By default, Mission Control can be trigged with the F3 button or the “Control+Up Arrow” shortcut. You can also trigger it from your trackpad with a three- or four-finger swipe up. To move between Spaces, you can use a three- or four-finger swipe on your trackpad or the “Control+Left Arrow” and “Control+Right Arrow” key commands.
Magnet
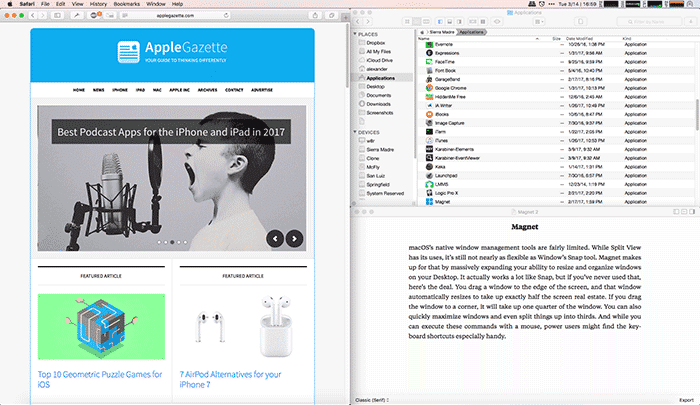
The native macOS window management tools are fairly limited. While Split View has its uses, it’s still not nearly as flexible as Window’s Snap tool. Magnet makes up for that by massively expanding your ability to quickly resize and organize windows on your Desktop. It actually works a lot like Snap, but if you’ve never used that, here’s the deal.
With Magnet, you drag a window to the edge of the screen, and that window automatically resizes to take up exactly half the screen real estate. If you drag the window to a corner, it will take up one quarter of the window. You can also quickly maximize windows and even split things up into thirds. And while you can execute these commands with a mouse, power users might find the keyboard shortcuts especially handy. It’s an inexpensive and fairly essential utility for anyone that needs to use five or six apps at once to get their job done.
BetterSnapTool
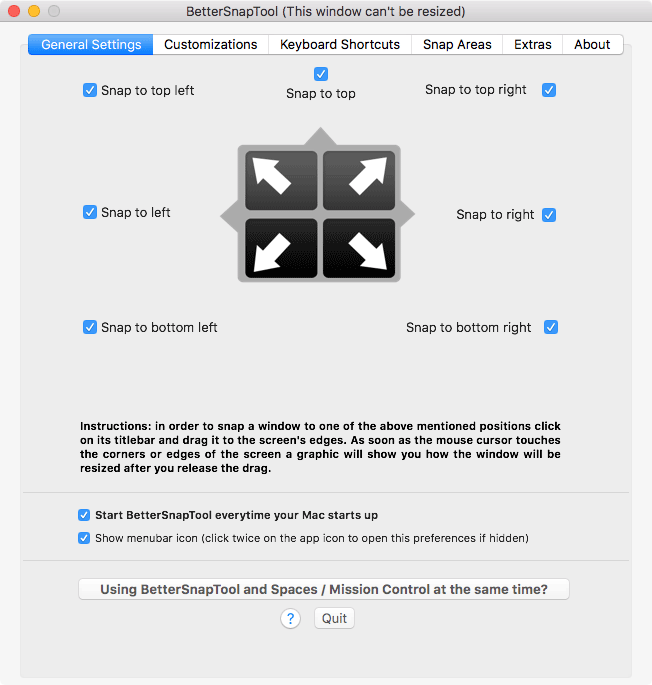
Where Magnet is a more powerful version of Split View, BetterSnapTool is a more powerful version of Magnet. Most of its strength comes from its insane customizability, but like most power-user-friendly software, that’s also its weakness. It works perfectly without any specific setup, but less-advanced users might find the smorgasbord of options intimidating.
Users can set their own snap zones and specify custom shapes for each. This means you can arrange your windows in whatever unique pattern you like, and then save those window positions to snap zones. Then you can snap back into the arrangement after things get moved around. It’s as close as you’ll get to actually saving a workspace in macOS.
The additional features of BetterSnapTool could be slightly overwhelming for novice users. But if you don’t mind a little fiddling, BetterSnapTool can really up your macOS window management game.
Split View
Split View might be the most basic macOS window management tool available, but it still has its uses. If you’re not familiar, Split View allows you to use two windows side-by-side in Full Screen mode.
To access Split View, click and hold the green maximize button on any full-screen-capable app to the side of your monitor. That window will shrink, allowing you to drop it on the left or right side of your screen. Then, select another full-screen-capable app from the currently open windows to fill the remaining space.
If you just need to see two things at once for a few minutes, Split View is a great way to quickly get that done.
Picture-in-Picture

Picture-in-Picture is what Alton Brown would call a unitasker: it’s good for just one thing, but it does that one thing pretty well. With Picture-in-Picture, you can “float” a video window on top of your workspace, making it always visible. This is perfect if you like watching TV while you work, and it currently works with iTunes and with YouTube and Vimeo in Safari.
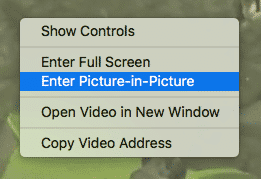
To use Picture-in-Picture on YouTube, double right-click on the video and select “Enter Picture in Picture” from the dropdown menu.
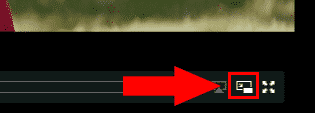
For Vimeo videos, click on the small Picture-in-Picture icon. You’ll find it next to the fullscreen icon.
If you want to enable Picture-in-Picture for Netflix, check out the Safari Extension PiPifier.
Pro Tip: Window Snapping and Mission Control
If you’re using Mission Control and window snapping at the same time, as any sane person might, you might quickly notice an incompatibility. When dragging a window to the edge of your monitor, you might accidentally move that window to new Spaces rather than snapping it to the side. To fix this problem, you can use a Terminal command increase the delay between moving a window and triggering Mission Control.
1. Open Terminal at /Applications/Utilities/Terminal.app or type “Terminal” into Spotlight.

2. Paste the following command into Terminal and press “Enter”:
defaults write com.apple.dock workspaces-edge-delay -float 2.0; killall Dock
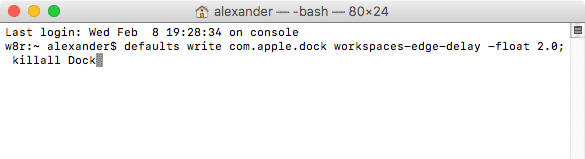
This will change the Mission Control delay to two seconds and relaunch the Dock to allow the command to take effect.
You might also like: