
Computers are here to do our bidding. When we have boring, repetitive tasks the best possible way to get them done is to get a computer to do them. OS X knows this, which is why there are some awesome tools included in the operating system to give you the ability to automate these tasks so you can spend less time on them and more time on what’s important.
Automator is an application that comes preinstalled with OS X, but is so overlooked it might as well be considered a hidden feature. Automator can be somewhat imposing to jump into without some guidance, so to get your feet wet with it, here is how to customize OS X with Automator and best of all, add the customizations to the right click menu. The easiest way to show you how to do this is with a few examples, so check these out and modify them as you need to for your specific needs. IF you want to read more about Automator, check out Apple’s support page here.
Convert Images to JPG
Depending on where and how you get your images, you probably have a variety of different formats. From GIF, to PNG, to TIFF, there’s a variety of image formats out there. If you work with apps or services that require a specific format, you can easily automate the process of converting those image files to JPGs using Automator.
1. Go to Applications > Automator
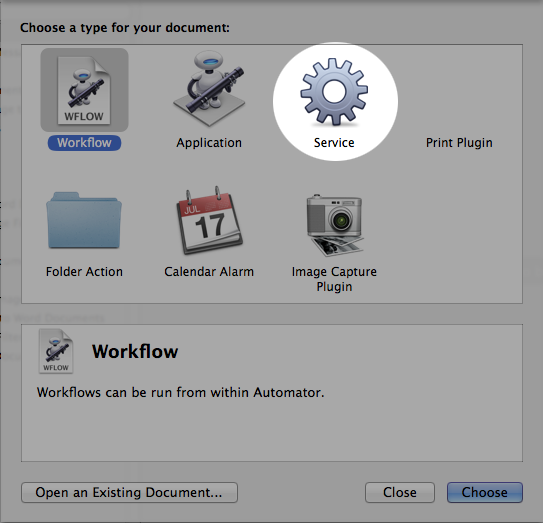
2. Once you launch Automator, you should first see an iCloud Automator screen. Click New Document to continue. Select Service in the new Document window that appears, then click Choose.
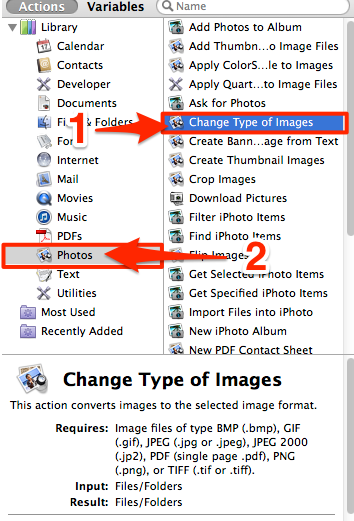
3. Once you click Choose you will see the main Automator window. In the left-most column select Photos then Change Type of Images. Double-click Change Type of Images to load it into the main screen. You’ll get a warning asking if you want to make a copy of the files you’re changing the type for. If you select Add, a copy will be made and that copy will have the new file type. If you don’t care about having the original files, click Don’t Add. For the sake of this tutorial we will make copies to preserve the originals, so click Add.
4. At the top of the right side window click the drop down next to Service receives selected and choose image files.
5. In the right half of the window you should now see two items added. The first is the command to make copies of the items and the second is the command to change file type. In the Copy Finder Items command, choose where you want converted images to go. By default this is the Desktop. If you do this on a regular basis with a large number of files, you may want to designate a specific folder somewhere.
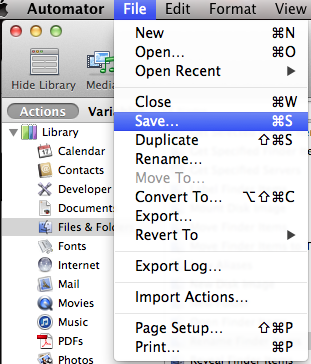
6. In the Change Type of Images command choose JPG. Go to the File menu and click Save. Enter in a descriptive name, like: Convert Images to JPG.
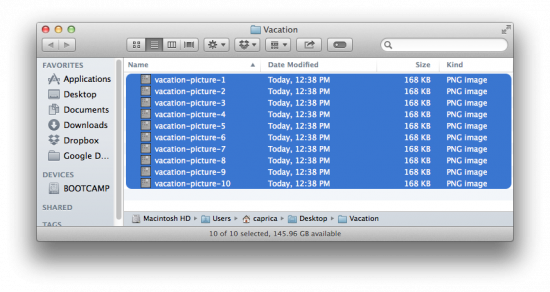
7. You can test this out by right clicking on an image file, scroll down to Services and choose the item you just created.
Replace Spaces with Dashes
If you’re preparing files for the Internet a best practice is to never include spaces in the file name. The best replacement for a space is the dash ( – ). If you have a variety of files that need the spaces removed it would take forever to find them all yourself and even then you’ll probably miss a few. Thankfully, Automator can do the work for you.
Start things off by completing steps 1 and 2 from above to get things going in Automator. Once you have it open and ready, you can start with step # 1 below.
1. In the right half of the Automator screen, click the drop down next to Service receives selected and choose files or folders.

2. In the left-hand menu, first choose Files and Folders, then Rename Finder Items. Double-click Rename Finder Items to add it to the workflow and the same warning from above will appear.. For the sake of this tutorial we will not be creating copies, so click Don’t Add.
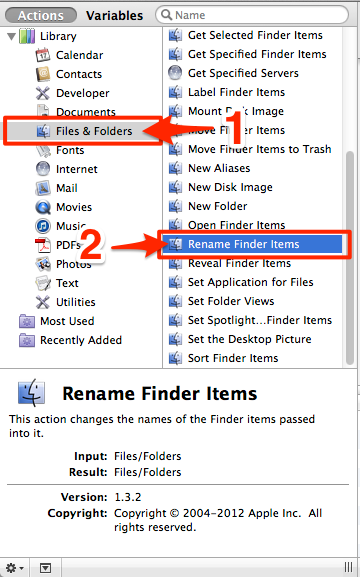
3. Click on the drop down that says Add Date or Time and select Replace Text. In the Find field enter a single space. In the Replace field enter a dash.

4. To finish this up, click on the File menu > Save. You’ll be asked to name the service, enter something that makes sure you know what it is later. For example: Replace space with –
5. You’re all set. Now you can select a group of files, right-click, go to Services and select the automation you just made.

Wrap-Up
Automator is capable of automating just about any tedious task on your Mac, this is just a small sampling. If you commonly combine multiple PDFs into a single file, capture desktop video, or even clear Internet history, Automator can help you out.
When creating other Automator jobs you can choose Workflow instead of Service and the task you create will be available to save and share, as it will be a file you run instead of a Service command in the right click menu.